By: Gren
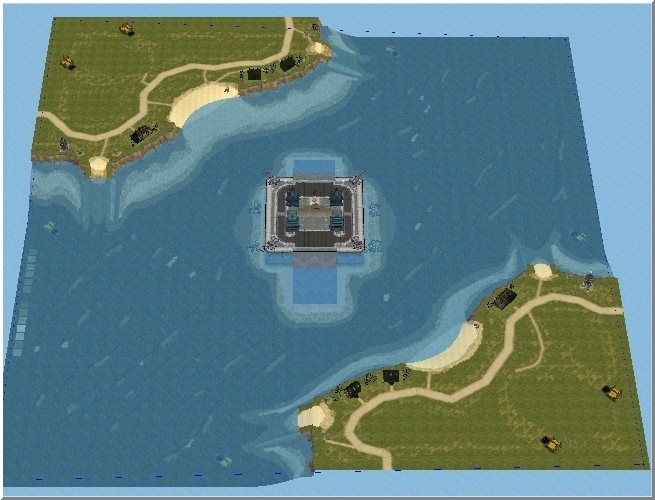
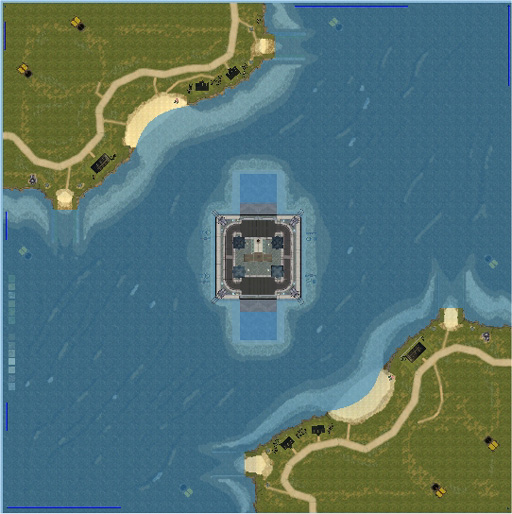
The Finished Map – Low LOD
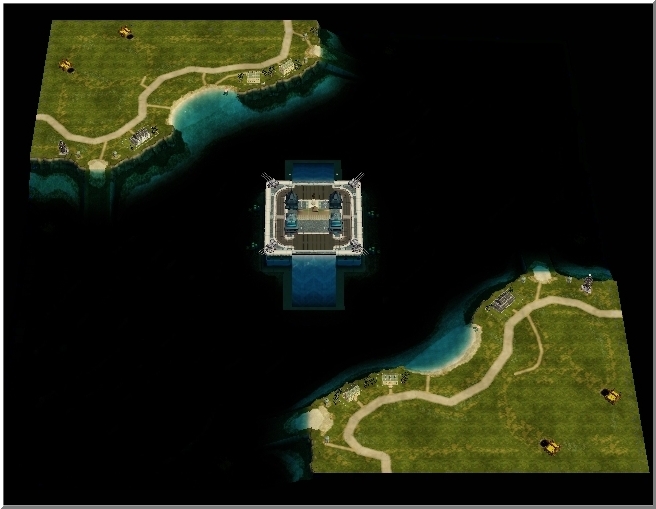
High LOD
So there we have it!
If you have followed the tutorial from beginning to end, Congratulations! You now have a finished, working Command and Conquer Red Alert 3 Skirmish map.
Well – not quite finished.
There is a very important step that you simply must carry out. TEST THE MAP IN-GAME.
Testing your map within the game is quite easy to do. With our 2 player example map, choose the Player 1 base first as your starting point and set Player 2 as an ally.
Check that all resources are accessible.
Check that there is sufficient building space around the base area.
Check for unsightly texture work.
Check that garissonable structures are accessible.
Check for unit bottlenecks.
Check that your water tables are correctly set.
Check that your terrain heights are correct.
Check any Cliff, Wall and Road objects for misalignment.
Check that Sea Vessels have access under bridges. (if any)
Check that Land Units can cross bridges. (if any)
Check all Ramp access points.
Then, play the map again, checking for the same and any other problems there may be, but this time set your starting position at the Player 2 base.
Our example map is a basic map and the Player Islands terrain I have left as totally flat. You may wish to apply some of the hints and tips in here to add a little uneven ground using the Mound, Dig and Height Brush tools on minimum settings. Be careful that the terrain isn't so uneven that your players are unable to place structures.
Practice more with the texturing tools too. You can really make some astounding texturing effects, once you get to grips with them.
When you have tested your map every which way and you feel that you would like to submit your map for hosting, there are one or two things that need to be done.
Top
Creating a Map Readme file
We at cnclabs.com expect all submitted maps to include a Readme text file that has your name as Author/Creator and Contact information (e-mail address) and a well-written map description;
Name: Grens Tutorial Map
Author Name: Gren
Author E-mail: gren@cnclabs.com
Description: This map is a very basic tutorial map, providing loads of manoeuvring space, a pile of funds for those people who are new to the game, tactical points for the more pro players, and terrain, which proves advantageous to newcomers.
And perhaps add:
Installation Instructions:
Change Folder Options to show hidden files and folders. Extract all files to:
Windows XP:
C:\Documents and Settings\[username]\Application Data\Red Alert 3\Maps\[map name]
Windows Vista:
C:\Users\[username.computername]\AppData\Roaming\Red Alert 3\Maps\[map name]
Replace the values in square brackets (RED Text) with the appropriately named information.
The Readme file can be created using the standard Windows Notepad utility and saved in the map folder before creating a .zip compressed file.
Top
Creating a MiniMap
Worldbuilder creates a standard MiniMap in .tga format when you save for the very first time. This .tga file is updated as you progress, each time you perform subsequent saves.
Worldbuilder Generated MiniMap
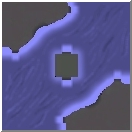
The style of the MiniMap for Red Alert 3 Official maps is quite different. Whilst the basic one is adequate, many players complain that there just isn't sufficient terrain information about the map in them.
I'm going to demonstrate how you can make a MiniMap along the lines of the Official maps, to give your map that little bit extra.
Set the top down view of your map in Worldbuilder, CTRL+F and zoom out so that you can see the whole of the map area.
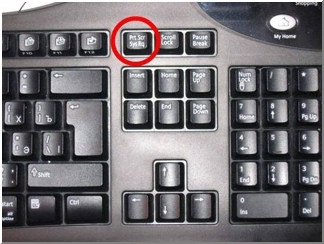
Take a screenshot by pressing the Print Scrn key on your keyboard.
Print Scrn Key
Minimise Worldbuilder and open your graphics program that should be able to save in .tga format; PhotoShop, Paintshop Pro or the free utility, Gimp.
Press CTRL+V to paste your screenshot into your graphics program.
Using the selection tools, crop the screenshot to the size of the map, then resize the whole thing down to 512x512 pixels.
Here is a Texture palette, which covers most of the RA3 Official map colours;
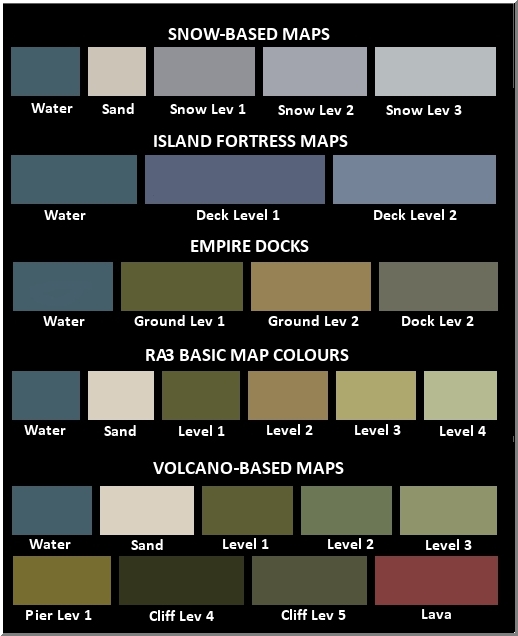
Load the Texture palette up into your Graphics program too and using the Eyedropper and Paintbrush tools, paint the areas of the map in our screenshot accordingly.
Use the Sand colour for the Player Island Access Ramps and Deck Level 1 for the Island Fortress.
You don't need to retain any Objects, as this is a terrain map indicator only.
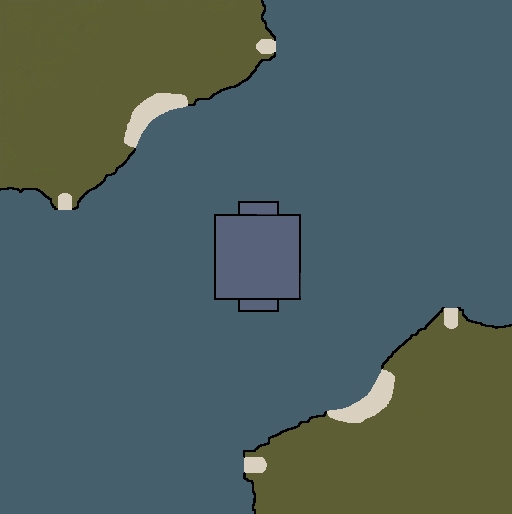
When the map has been painted up with the suggested terrain colours, I usually use a black line to outline the islands, separating them from the sea areas.
MiniMap Painting Complete
The only thing we need to do now is to save the MiniMap as a Targa file (.tga)
Select Save As in your graphics program.
We need to rename the file to be as exactly the name of the map, but with '_art' added to the name;
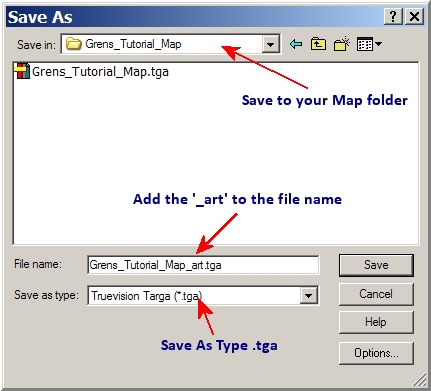
The '_art' part of the file name will allow the game to recognise that this is the file to use for the MiniMap. The original file (in this case Grens_Tutorial_Map.tga, which you can see above) can be safely left in the map folder.
Top
In Game Screenshots
Taking screenshots in game is very easy. Simply press the F12 Function key on your keyboard, once you have lined up your shot.
The pictures are sent in Bitmap format (.bmp) to
C:\Users\[Username]\Documents\Red Alert 3\Screenshots in Windows Vista.
C:\Documents and Settings\[Username]\My Documents\Red Alert 3\Screenshots in Windows XP.
Here are a few screenshots of our Tutorial map I made whilst testing.
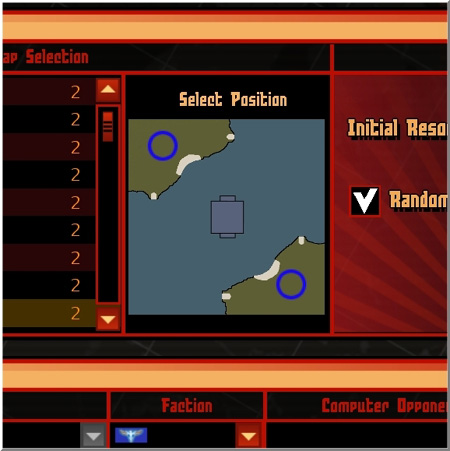
Our New MiniMap in the Selection Screen
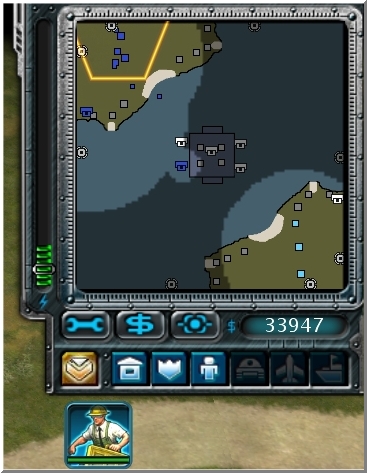
Our MiniMap in the Game
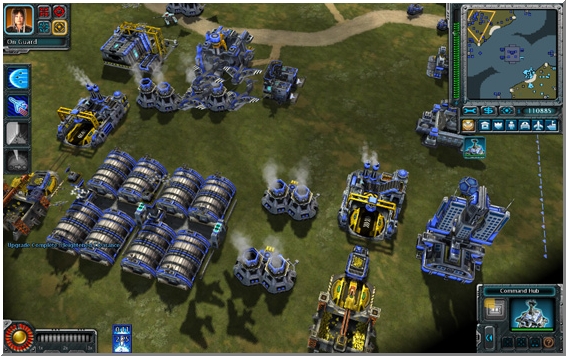
Shot 1 of the North Player Island
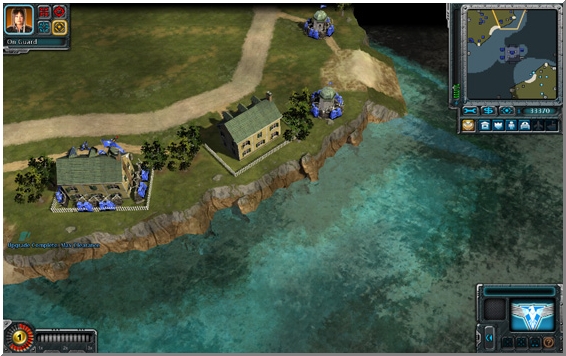
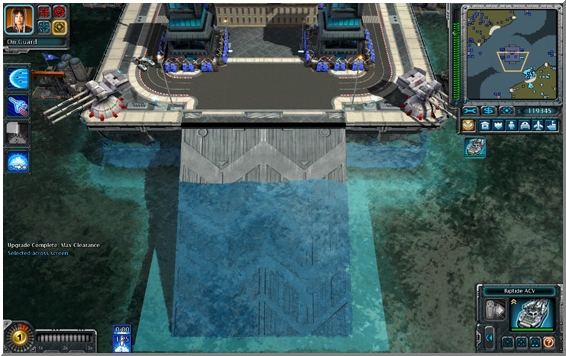
Riptides to the Island Fortress
Shot 2 of the North Player Island
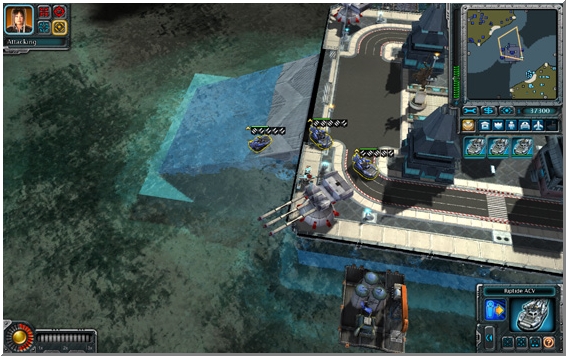
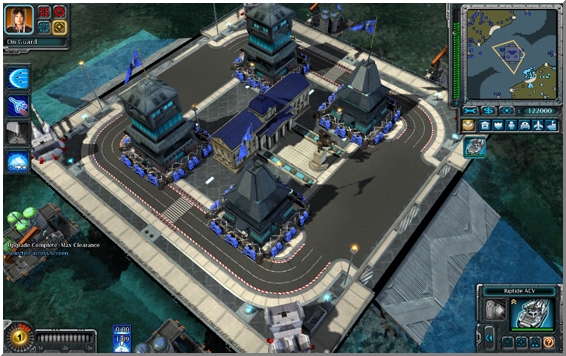
The Central Island Fortress
Central Island Fortress Southern Access
Last Words
Making maps with the RA3 Worldbuilder is, or should be, above all Fun. Your maps should also be fun to play as a first consideration. You don't have to make them an absolute work of art, but as you go on from this tutorial, you will make bigger and better maps as you become more knowledgeable and confident with the toolset.
If you come across anything you are not sure about, you can always ask about it on our Forums, or e-mail/PM one of our staff.
Happy Mapping!
Gren - gren[at]cnclabs.com
Top