By: Gren
Island Fortress Ramps
Now to add access ramps to our central Island Fortress.
This will be done in two main stages; the first steps of this task will be, more or less, just the same as we have already done for the player island bases. Then we will be using one of the fortress ramp objects over the top of this in completion.
Use CTRL+F to set the map to top down view and zoom in so that you can work comfortably on the southern side of the fortress island.
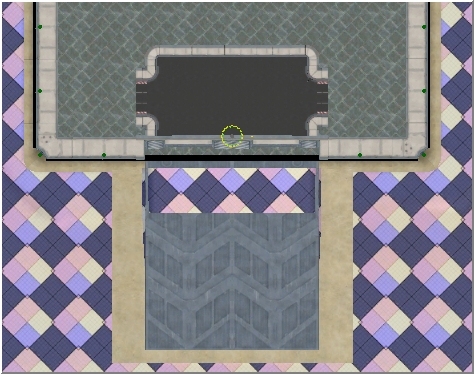
Southern Side of Fortress Island
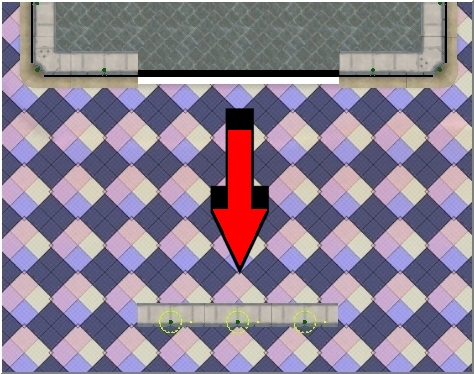
Using the Select and Move tool, draw a rectangle shape around the 3 middle sections of the fortress wall and select them. Move these 3 sections directly downwards, away from the island structure.
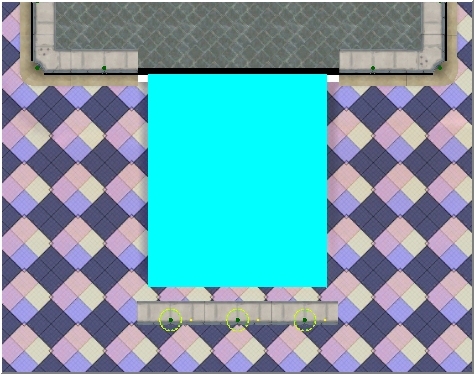
You will now notice the invisible texture-work, which we carried out earlier when we painted the terrain around the walls of our fortress, showing up as a white area.
Select the Ramp tool  from the toolbar and adjust the Ramp width to 134. This width is roughly the size required when placing Fortress Ramp objects to the first level.
Place the pointer of the tool, just in front of the icon of the centre part of the middle section we moved away from the fortress, as centrally as you can. Click and draw the ramp overlay up to the black line on the floor of the Island Fortress.
When you are happy that the ramp position is centred, click the Place Ramp button on the Ramp Options dialogue.
Terrain Ramp in Place
Exit from the Ramp tool by single right click of the mouse.
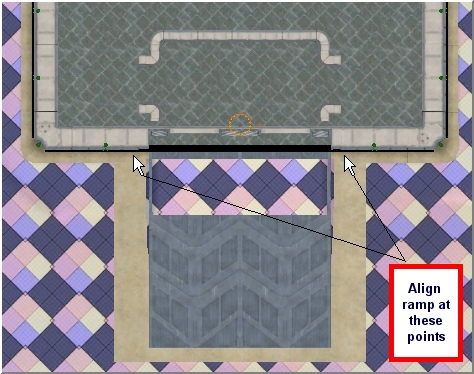
Select the Place Object  tool from the toolbar. The ramp we need from sea to first level is FI_Ramp01. Scroll down in the Object Selection Opts list and select this. Place the ramp on the map and position it so that it lines up exactly with the existing Fortress walls.
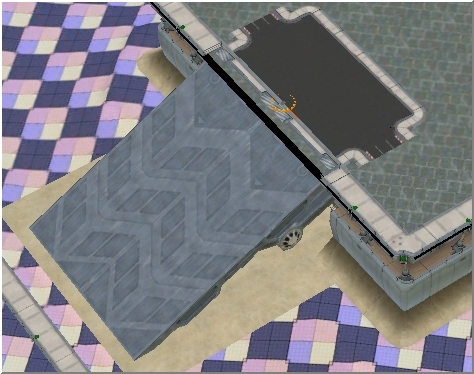
Fortress Ramp in place.
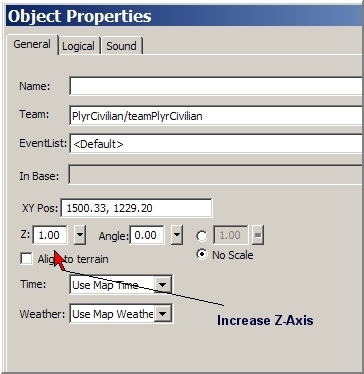
Having placed the ramp, you will notice that Fortress floor texture is still visible through the landing bay area of the ramp. To reveal the markings in the bay we need to fractionally raise the ramp. We do this by increasing the Z-Axis in the ramp's Object Properties by 1. Usually we need to do this for most Road and Ramp objects.
Landing Bay Area Revealed
To finish off this step, all we need do now is tidy up the exposed and unwanted terrain on the ramp surface and sides.
Select the Single Tile texturing tool  from the toolbar. In the Terrain Material Options dialogue, select the Visibility radio button under Terrain Painting mode and ensure the Invisible option is checked.
Click on the map title bar to make it active and use CTRL+F to exit from top down view. Carefully paint out the unwanted areas along the sides and on the ramp itself. When completed, reset the Terrain Painting mode back to Texture.
Completed Island Fortress Ramp
Lastly, we need to remove the sections of Fortress wall that we moved from the Fortress and placed on the sea floor. Using the Select and Move  tool, either hold down the SHIFT key and click on each item icon to select them, or draw a rectangle around all three, then press the Delete key on your keyboard.
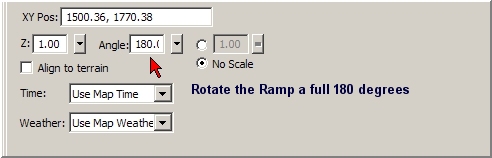
Now, according to our rough design sketch, we need to repeat these steps on the Northern wall of our Island Fortress. Rotate the map and see how you get on.
(Hint: When placing the ramp object for this side of the Fortress, you will need to change the orientation of the ramp by 180 degrees in the Angle setting of the Ramp Object Properties dialogue)
Island Fortress – Both Ramps Completed
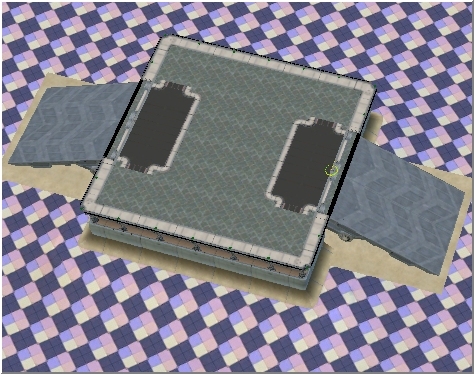
Save your work. 
Top
Resizing the Map and Adding Water
Looking at our small tutorial map, we may think that the two player islands seem a little on the small side to be able to set up a player base with enough room to hold base utilities, a few resources and perhaps one or two buildings to use as garrisons, which can be used in the way of protecting the base.
We can easily change the size of our map using the following procedure: Put the map into top down view, [CTRL+F] then using the Select and Move tool choose the File option, and then Resize. You are presented with the map Resize settings dialogue:
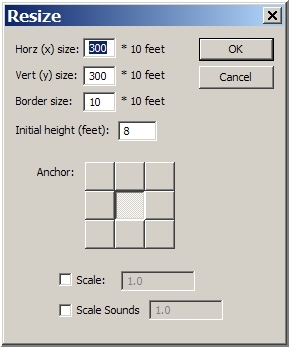 In the way of a demonstration, I'm going to add an extra 500 feet to each side of the map, by changing the Horz (x) size and the Vert (y) size fields to read 350, retaining our original border size of 10 (100 feet).
Although the Initial Height setting reverts to a default of 8, I have found that there seems to be no effect if you leave this setting alone, or enter our original height setting of 20.
Leave the Anchor setting as central. This tells the tool that we need to resize around the outside of the map.
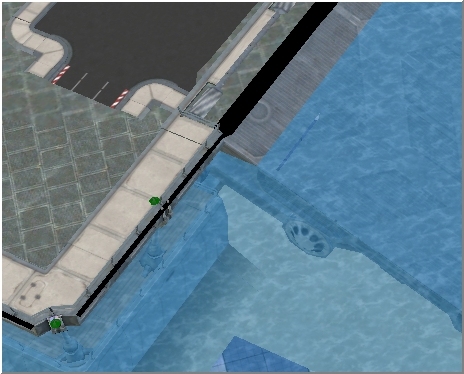
Click the OK button
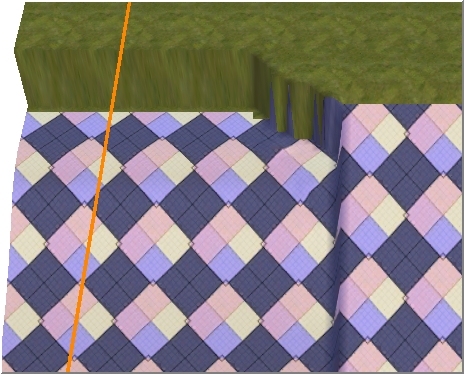
Southern ramp area of North Island after resize
Top
Adding a body of Water
Adding water to our map is a very easy task once you know how.
With the map in top down view, and zoomed out so that all of the map area is visible in the Worldbuilder 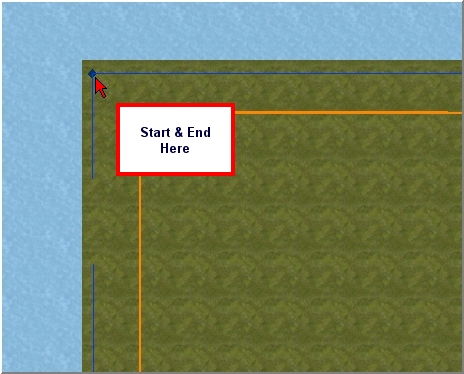 window, choose the Lake/Ocean
  tool from the toolbar and beginning at the top left hand corner of the map, left click once in each corner, finishing back at the top left hand corner again.
As you continue to place the water markers in each corner, you will see a blue border line being drawn and with LOD set to Low, the outside regions of the map will change to blue.
The Object Properties dialogue is replaced with the Lake/Ocean Options.
Lake/Ocean Options
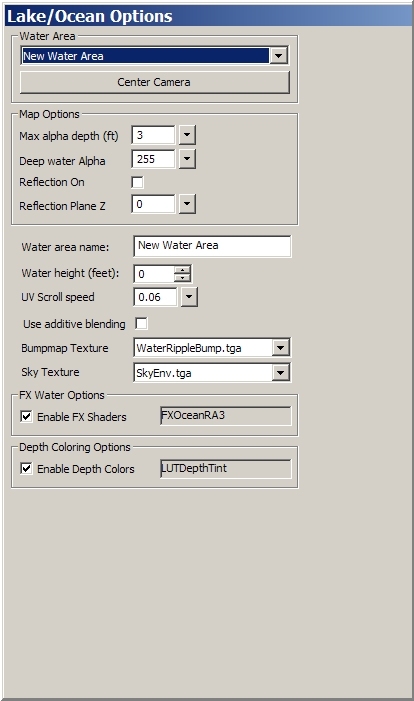
In the Map Options section of the dialogue, set Reflection On.
When setting the water level, there are some things to consider:
You can set the level to any level you desire, and the map will show the correct level whilst you remain in the map low LOD (Level of Detail) setting.
If you change the LOD setting to a higher level, or play your map in-game, the water level setting you enter in the Lake/Oceans Options dialogue, will be ignored and the default setting of 200 feet will be used.
For this reason, it is a good idea to design the "dry land" areas of your map to be above 200 feet.
Make the Reflection Plane Z setting the same value as your Water Height. This will ensure that shore-line reflections are closely projected, giving a realistic reflective effect.
Place a check-mark in the Reflection On setting, so that the reflections actually appear in-game.
If you change the LOD setting to produce WB screenshots, you will need to disable the Reflection On setting, by removing the check-mark, otherwise, the default water level in High LOD, will clash with the reflections, distorting the whole map, which then will be unsuitable for making screenshots.
Not compulsory, but you can give your body of water a name if you wish. (I called mine Grensmap Sea)
Set the Water Height (feet): parameter to 190.
There are a few Bumpmaps for the water and the sky environment, which you can have fun experimenting with later on, but for now I will leave them at defaults.
Ensure both FX Water Options and Depth Colouring Options are checked.
Move the mouse cursor back on to the map and right click once to exit the tool.
Water Body Added
Save your work.
Top
» Next ~ Adding Cliff Objects