By: Gren
So now lets begin work on our Floating Island Fortress.
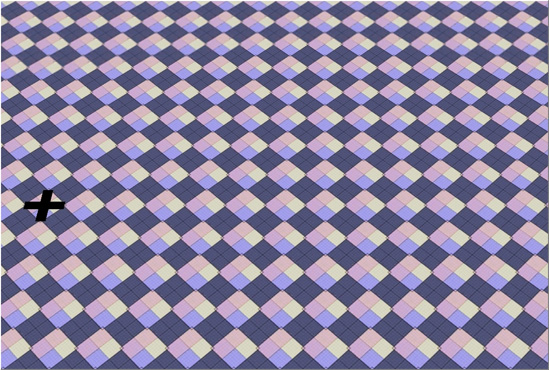
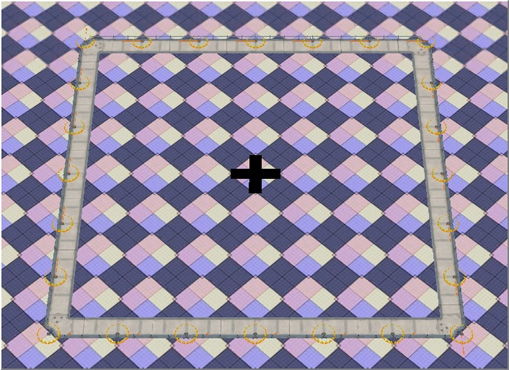
Zoom the map in to a comfortable working level to one side of our centrally marked square:
Activate the Lock Angle tool on the toolbar by clicking on it just once. The icon for the Lock Angle tool looks like this:  and ensures all the items we are about to place have a uniform angle.
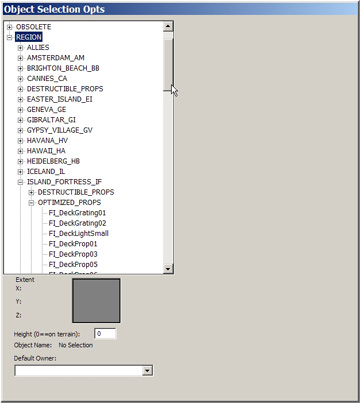
Click on the Place Object tool:  and the Properties Object window changes to Object Selection Opts, where a collapsed tree structure is displayed:
ByNativeType
GYPSY_VILLAGE_GV
MISC_MAN_MADE
OBSOLETE
REGION
This is where all the usable objects will be available for selection and placement into our map. Opening the categories is done by clicking the small square containing a "+" sign to the left of the category label.
Select REGION -> ISLAND_FORTRESS_IF -> OPTIMIZED_PROPS
Using the Scroll Bar to the right of the item window, scroll down by clicking and dragging, until you find the item FI_EdgePiece01 and select it by clicking on it. Move the mouse pointer onto the map area and it will change to the Place Object pointer.
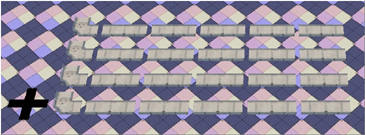
Place 4 horizontal rows of 5 FI_EdgePiece01 on to the map grid and 4 single FI_EdgePiece02 in a vertical row to the left of the FI_EdgePiece01s so that you have something like this:
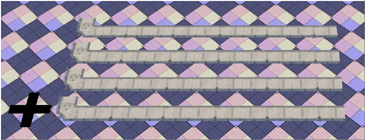
Click on the Select and Move tool  and join each row together by clicking and dragging on each object icon (the small gray dot) lining the pieces up as accurately as you can.
Make a little room between the rows by selecting a row and dragging it away. Selecting a number of items can be done either by drawing a rectangle around them or holding down the SHIFT key whilst clicking on each item's icon.

With a full row selected, you will notice that the Object Properties box is displaying various information about the actual group of items and it is in here that we will change the angles of each side necessary to create a box shape. The row closest to us doesn't need to be adjusted. Select the row to the left (ensure all item icons are selected) and in the Object Properties, Angle field, remove any existing value and type in a value of -90. Then click back on the map. This de-selects the row and sets the item icons to the new position. Selecting the row again, will display the row in the changed position.

Repeat this procedure for the row we moved over to the right, but with a value of 90, and the row furthest away from us at the top with a value of 180.
With a full row selected, join the parts together to form a square shape.
It is possible to move a full group of selected items by clicking in the highlighted icon area and dragging to the new position. There are 2 modes of movement when doing this:
1. Moving to a new position a small cross is displayed under the pointer.
2. Rotation a small arc/arrow is displayed under the pointer.
Be aware of the mode you are using.
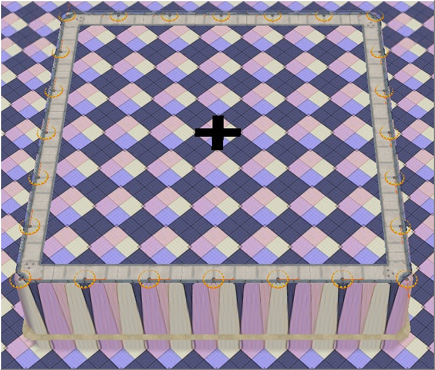
When the square shape is formed, select the whole thing all the items and position it over our center mark, making the shape as central as you possibly can. To help with this task we can switch to overhead view and back quite quickly by using CTRL+F.
Having completed this stage, our next task is to raise the terrain within our square to a height that will eventually reveal the outside walls of our Fortress and allow the top to appear above the waterline. Water level (height) should be set at 190-200 feet for optimal effect, so I am going to set our Fortress deck at a height of 210 feet, which will give us a 10-20 feet margin.
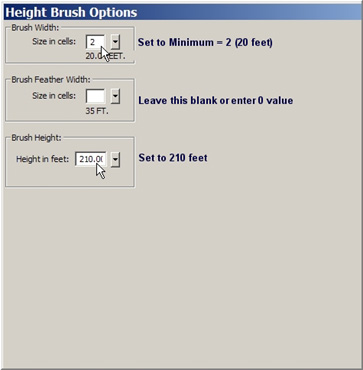
Disable the Lock Angle tool by a single click. Select the Height brush tool  and in the Object Properties/Height brush Options, set the Brush Width to the smallest size, which is 2, leave the Brush Feather Width blank or 0 and set the Brush Height to 210.
My own method of doing this kind of task is to single click under each item icon to raise the walls to the correct height first and then change the brush size to cover a larger area to fill in the rest of the square.
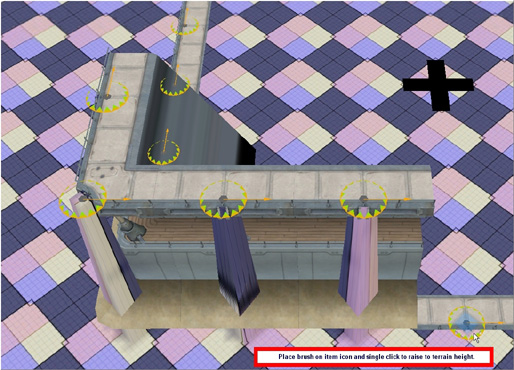
It doesn't matter that the terrain is showing through the fortress walls at this stage. When the whole of the terrain inside our square is leveled, we will be hiding the parts of the terrain that we don't want to see.
Continue to raise the rest of the walls then change the brush size in the Height Brush Options to 5 or 10 and raise the rest of the terrain inside our square, being as careful as you can not to stray too far outside of the square boundaries. If you make a mistake, you can use the Undo option up to around 10 times. [CTRL+Z]
If you run out of "Undos", you can always reset the Height Brush to our initial terrain height of 20 feet, flatten everything under the square and start again.
To help with raising the sides, I usually complete one length and then rotate the map using the mouse wheel to give me the same orientation as I had with the completed side.
A single click on the mouse wheel will reset the map to its natural position - all squared up and aligned.
All sides raised...
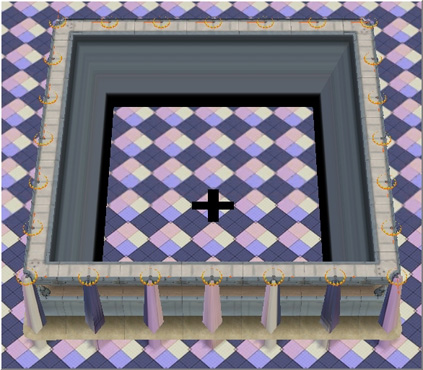
...and filled in.
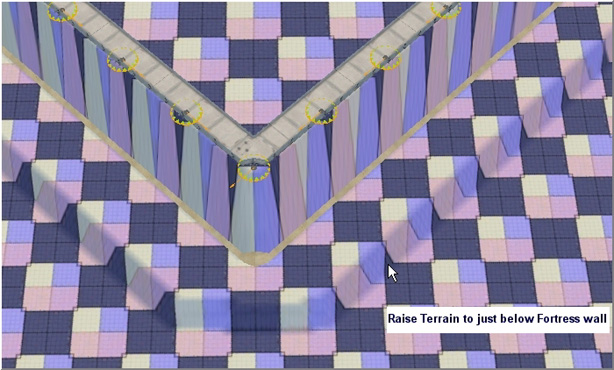
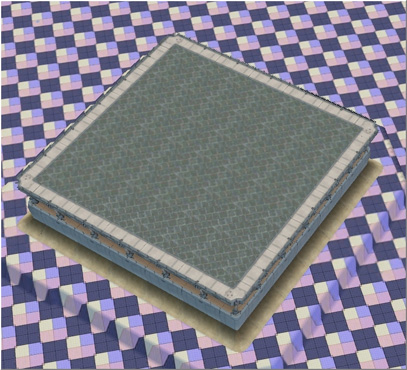
Now because we set our initial terrain level to 20 feet (which is my preference really) we can see the base of our fortress walls sticking out slightly higher than the sea floor. The procedure we have to take to hide the unwanted terrain on our Fortress walls will also expose the tiles below our base as an unsightly white area. Although this area will be underwater, it will still be visible.
To prevent this happening, I set my Height Brush to 60 feet with an area spread of 5 (50 feet) and carefully raise the terrain around the bottom of the fortress base. So at this stage it looks as though the Fortress is standing on a platform. Also, the platform doesn't need to be symmetrical, as we will be smoothing it out a little later on.
Now to hide that unwanted terrain around the walls of our fortress.
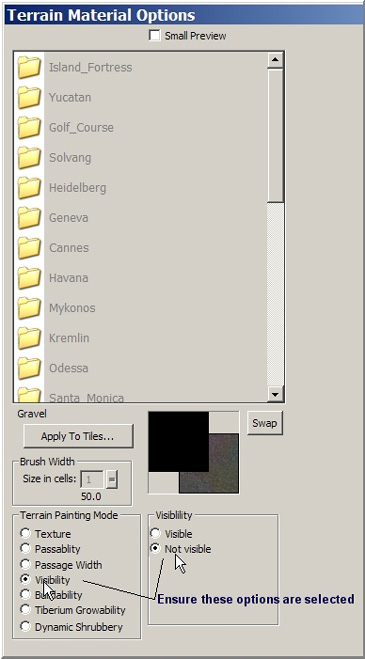
Select the Texture Single Tile tool  and in the Objects Properties/Terrain Material Options, click on the Visibility radio button. Our map is suddenly covered with red squares. These are the anchor points for the tiles we can set visibility to. On the Terrain Material Options, ensure that the Not Visible radio button is selected and then carefully paint the stretched terrain tiles on our Fortress walls.
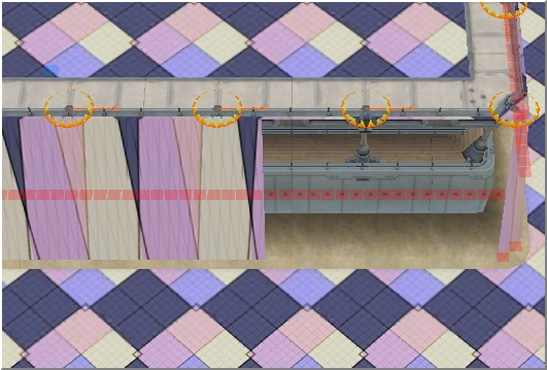
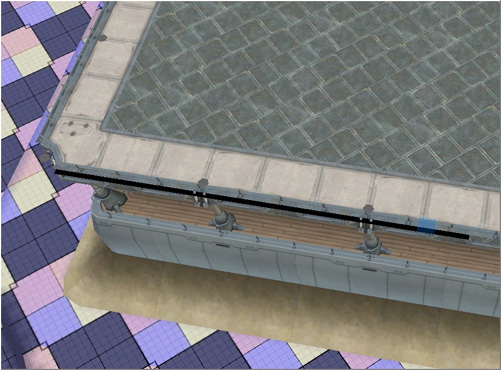
As you paint with invisibility set, you will see that the structure of the Fortress wall is exposed and each red anchor point has a small dot placed in its center.
Continue all the way around our Fortress until all the stretched tiles are done. Then, still with invisibility set, check for overhanging terrain around the top of the wall and remove this too if you wish. Apart from the tops of the 4 corners, I am going to leave the overhang as I think when we texture the Fortress top; it will offer a little enhancement.
When you have finished, reset the Terrain Painting Mode in the Terrain Material Options, back to Texture. The red squares will disappear from the map.
Now the need for our center mark is no longer required for the Island Fortress itself, we can paint a texture for the Fortress floor.
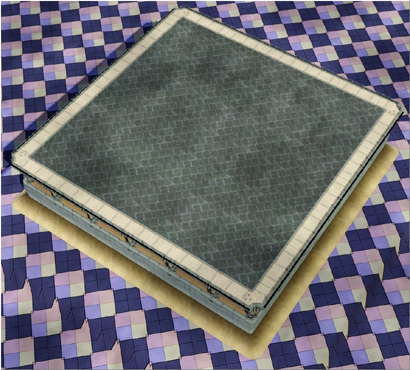
Select the Texture Large Tile tool  from the toolbar and then open the Island Fortress folder in the Terrain Material Options dialogue. I am going to use steeldeck02-256 to apply to the fortress floor. Carefully paint as far as you can using the Large Tile tool, then change over to the Single Tile tool to finish off near the edges. You should end up with something like this:
Now, for that little bit of enhancement I mentioned, with the same Single Tile tool, choose the texture fortressblackedge-256 from the Terrain Material Options and carefully paint the overhang on the outside edge of the Fortress floor.
That done, I'm going to take a hi-res screenie. A procedure I'll be going through later on.
Again, at this stage, its a good idea to hit the save button. 
Top
» Next ~ Making the Island Player Bases