By: Gren
Detailing The Island Bases
Now we can move on to the player islands and see if we can make the terrain on there a little more interesting.
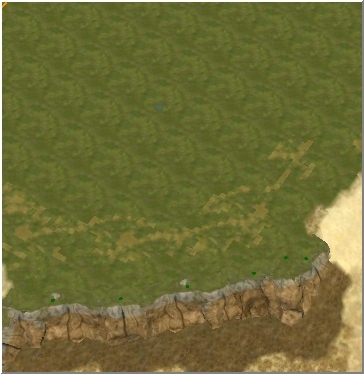
Using the Eyedropper tool,  select grass_yucatan06-256 from our palette then select the Single Tile texture tool
  from the toolbar. Working on the area of terrain just behind the cliffs, lay down a random pattern with the texture, but don't try to overdo it.
Lay down Texture
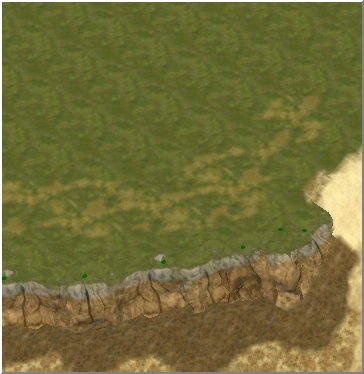
Select the Auto Edge Out tool  and carefully click in an area of the 'square' tiles we have just laid down to blend the edges into the existing grass texture. You will notice that the Auto Edge blending tools are effective on tiles of the texture you are blending, which have been laid down in contact with each other. So you may have to work along your texture strip and apply the tool again on any areas that have been laid down separately.
You can repeat this on the other player island.
Blended with existing grass
In exactly the same way, use the Eyedropper to select the grass_yucatan07-256 texture from our palette and again using the Single Tile texture tool, sparingly apply small areas in and around the grass_yucatan06-256 texture previously blended and blend this in using the Auto Edge Out tool.
Apply Complimentary Texture
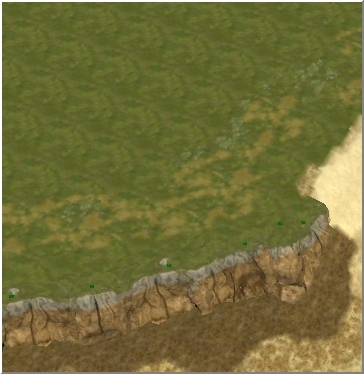
Blend in Complimentary Texture
Experiment a little with different grass /dirt textures from our palette. If the worst comes to the worst and you end up with something that doesn’t look quite right, you can always select the base grass texture and with the Large Tile texture tool, paint everything over and begin again.
As you can probably see, texture-work goes hand-in-hand with the terrain layout and object population of the area. The small example of texture work we have just done, is related directly to the cliff, beach and ramp areas of the island. So whilst we still need more textures to make our islands look better, we can continue to apply them as and when we place our choice of objects on the terrain.
Save your work. 
The Mound and Dig Tools
The names of these tools are probably quite self-explanatory and in simpler terms, the Mound tool piles more terrain on to a selected location and the Dig tool removes terrain from the map based on the settings in the Terrain Brush Options window.
Both these tools are normally used in conjunction with the Smooth Height tool.
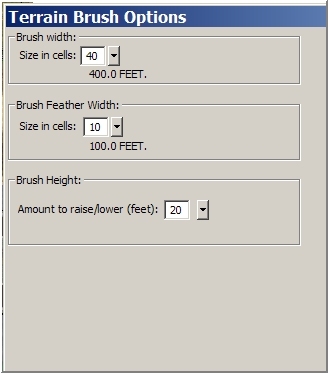
For a quick demonstration, select the Mound tool  from the toolbar and in the Terrain Brush Options dialogue, set the Brush Width to 40, the Brush Feather Width to 10 and Brush Height to 20;
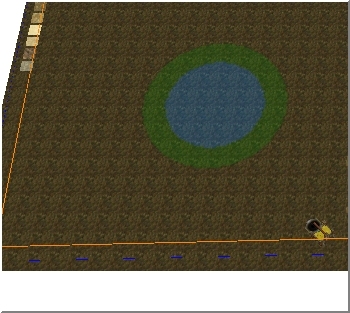
Now place the pointer on to the map where you will see a blue solid circle, with an outer green ring. The blue area is showing the Brush Width you have just set and the green area is signifying the Brush Feather Width. The Feather Width area is an area where the set height is gradually reduced to create a smooth effect.
Left click and hold the mouse button and drag in very small circles. This will rather quickly raise the terrain under the coloured area. Release the mouse button after doing 2 or 3 rotations;

The terrain is lifted into a hill shape. Of course, this is far too large for our map's sea floor effect. So press CTRL+Z to undo the mound and return the terrain to flat.
In the Terrain Brush Options dialogue, set the Brush Width to 2, The Brush Feather Width to 1 and the Brush Height to 10.
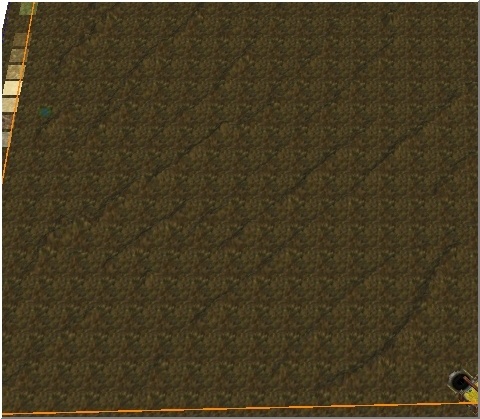
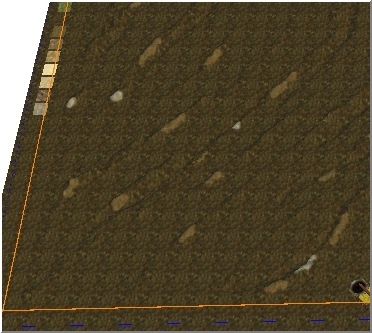
Looking at our tutorial map, it would be fair to assume that the water area could have a diagonal flow or movement across the terrain. It doesn’t matter whether it would be left to right, or right to left, but we can enhance the suggestion of the water movement, by placing small ridges of terrain in a similar direction.
With the pointer on the sea floor, click and hold the mouse button and drag in said direction to create the small ridges.
Take into account, the Central Fortress and "suggest" that the water body will flow around this.
Although we want to give the impression of the direction of flow, don’t fall into the trap of pointing every ridge directly into the corner of the map.
If you have something similar to the next picture, well done! If not, practice a little more and get more familiar with the tool.
Ridge effect on Sea Floor
Now we will try to enhance the sea floor a little more. Select the Dig tool  from the toolbar. You will notice that the Terrain Brush Options are not changed. Carefully "dig" a small trench alongside some of the ridges we have just created;
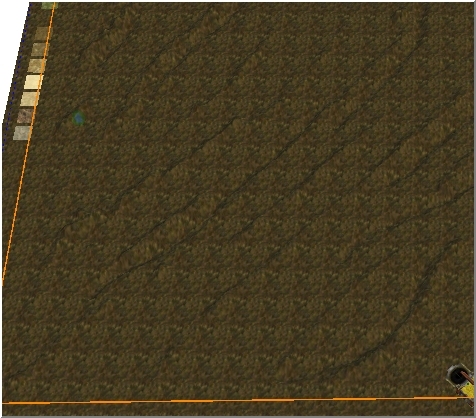
So really, we are just slightly emphasising the ridges, by placing a shallow trench next to them.
To complete this step, we can enhance the sea floor a little more with a couple of textures.
Use mud_havana02-256 and rock_yucatan01-256 from our palette and the Single Tile texture tool and touch in a few areas of the ridges, blending them in, using the Auto Edge Out tool.
Save your work.
Top
» Next ~ Setting the Player Starting Points