 Tutorial by Fleetatks
The Command & Conquer Generals World Builder program is used to create worlds -- commonly referred to as "maps" -- for Command & Conquer Generals and Zero Hour. This tutorial assumes the Zero Hour expansion pack is installed, but its general concepts should be applicable for C&C Generals without the expansion as well.
This tutorial is intended for people who want a step-by-step walkthrough of the process of making basic maps for C&C Generals: Zero Hour.
Note that this tutorial has been edited from the author's initial version by our staff.
» Quick Links
» Table of Contents
» Initial Setup
Before we get started, open World Builder, go to the View menu, and make sure the following items are checked:
- Show Terrain
- Show Boundaries
- Show Waypoints
- Show Objects
- Tool bar
- Status bar
- Show Weapon Ranges (optional)
All other options should be left to their default setting. This tutorial assumes you have your World Builder settings set up in the way described.
Information about the Boundary: Everything outside of the boundary will not show up in-game! The boundary is an orange square near the edge of your map in World Builder. When you click New Map, you can change how big the boundary is.
» Important Tools
Probably the most important tool is the Object Properties window:
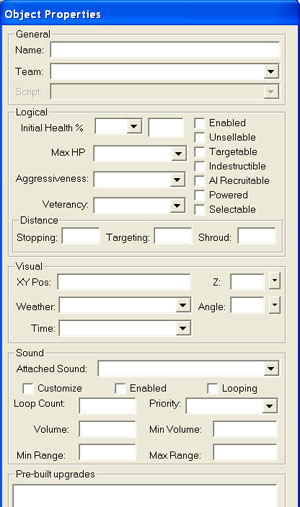
This window pops up whenever you open up World Builder. It will be used to do anything from picking textures (the look of the terrain) to resizing how big your dig/mound tool is.
These are the tools in the bar at the top of the World Builder:

- A: New World Builder Level (note that this allows you to choose how big your map is and how high the ground is)
- B: Open (opens a previously saved map)
- C: Save (save current map)
- D: Cut (cuts everything in your map into the clipboard, allowing you to paste it into another)
- E: Copy (makes a copy of everything in your map, allowing you to paste it into another)
- F: Paste (pastes the cut/copied terrain)
- G: Ruler (can be used to see if lengths are even; click circular measurement for measurements in a circle)
- H: Arrow (allows you to look around, left-click to select objects)
- I: Lock Angle (makes it so that you can't spin the camera angle of the map)
- J: Height Tool
- K: Mound (raises the height of the ground for hills, mountains, etc.)
- L: Dig (digs into the ground; for rivers, lower terrain, etc.)
- M: Smooth height
- N: Mesh mold
- O: Water (creates a water area)
- P: Paint single tile (paints a single square on the terrain map for finer detail)
- Q: Paint large tile (select which number tiles you want to paint; good for mountains)
- R: Eye dropper (select terrain that's already on the map, for quick selection)
- S: Spill paint (Fills entire map with a certain texture)
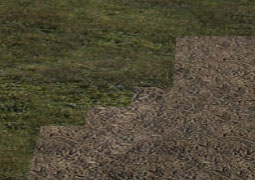
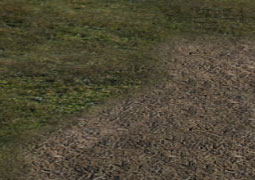
- T: Auto edge out (blend tiles together to make a non-blocky look; examples follow)

- U: Auto edge in (used for blending three different textures together)
- V: Blend single tiles (like auto edge in and out, but so that you can create a finer-detailed look)
- W: Place object (used for placing objects on the map, such as buildings)
- X: Road/bridge creator (place roads on the map, helping players see paths to destinations and making cities look realistic. Bridges can be placed on the map to allow units to cross a body of water or over high ground.)
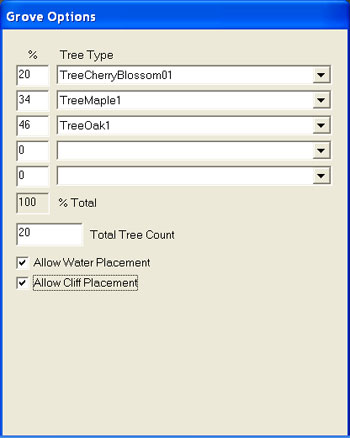
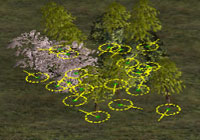
- Y: Shrubbery placer (useful for placing a lot of trees/shrubs on a map: examples below)
- Z: Ramp tool (place passable paths through mountains or level land [examples follow]. You can press CTRL+I to see impassable areas.)
View -> Show Impassable Areas (CTRL+I) (before and after):
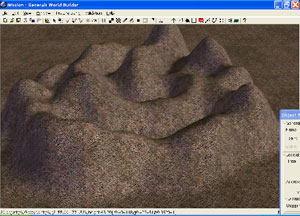
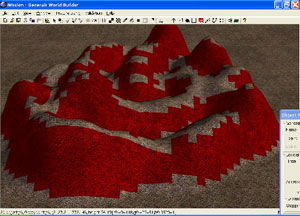
Using the Ramp Tool (before and after):
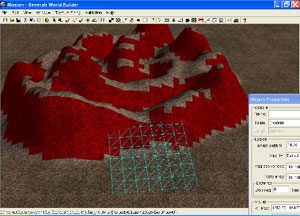
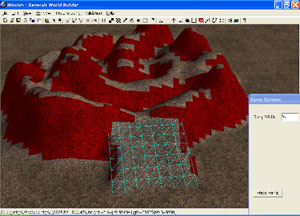
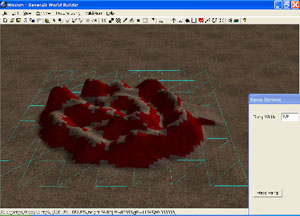
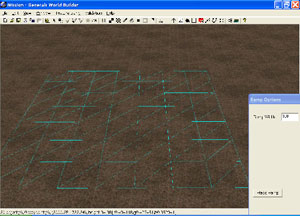
WARNING: If you make a ramp bigger than 350 and place it, World Builder will crash!
- 1: Smudge placement (adds burn marks and smudges to the map)
- 2: Fence creator (places a straight line of objects [i.e. a fence] quickly)
- 3: Build List (Removes object from build list; not recommended)
- 4: Waypoint (adds waypoints to the map; explained in more detail later)
- 5: Polygon/area tool (creates an area on the map; more explained later)
- 6: Border (creates a new map border [note that it must be activated with scripts])
- 7: Scripts (scripts allow you to do control various aspects of your map [everything not related to terrain, lighting, and weather])
- 8: Teams (sets teams of units that can be created for a specific players; activated by scripts)
- 9: About (tells you World Builder's version information)
Now, it's time to create your first map!
» Making Your First Map
We'll start off by putting a nice looking texture on the ground.
World Builder always starts you out with that ugly gray ground that you see. Go to your  paint spill tool and pick a terrain inside of your object property box. You will see a number of choices, but to start, click the
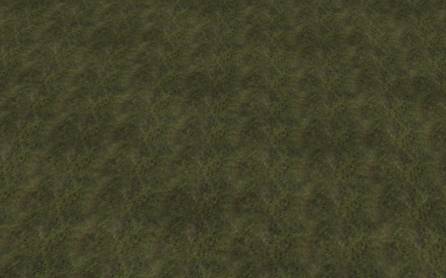
  button and then click 2%grassmediumtype3 and spill it on the ground. Everything should now look like this:
Making Mountains with World Builder
Now use the  mound tool to create some mountains. In your object property box, click Brush Width: 5, Brusher Feather Width: 3, Amount to raise/lower: anywhere between 15 and 25 is fine for now (I usually use 25 for mountains). Note that the highest height is 316 (very tall).
While we're doing this, be sure to turn on show impassible areas in the view menu (CTRL+I).
The trick to making realistic mountains is A: texture, B: how misshaped and unsymmetrical it looks. I’ll show you how easy it is to make good looking mountains. Try to follow along as close as you can, or create your own style.
First lay down texture using the  large tile tool like so (I used desert2 > 11%clifflargetype12):
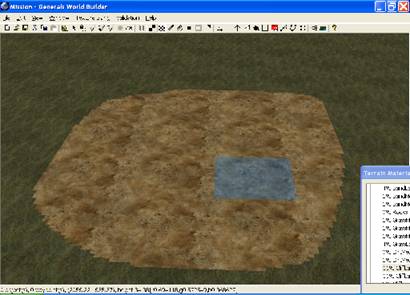
Then use the  auto edge out tool (click and hold at the new texture, letting go when at the other texture) and blend the tiles to make it more realistic looking. This is what you get:
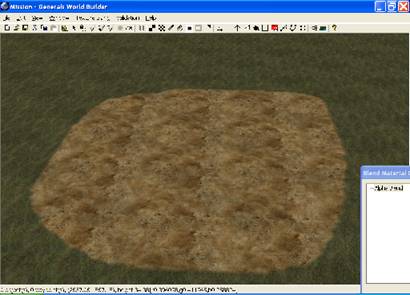
Now, use the mound tool to make some mountains (note that you can hold down the mouse to use this tool, instead of repeatedly clicking).
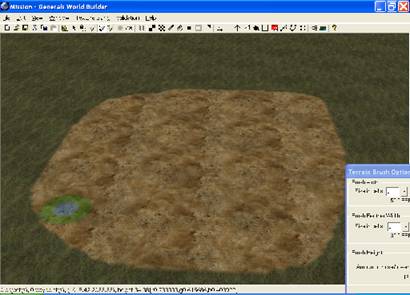
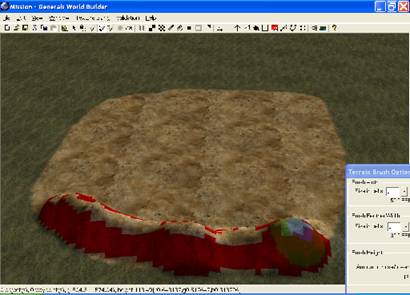
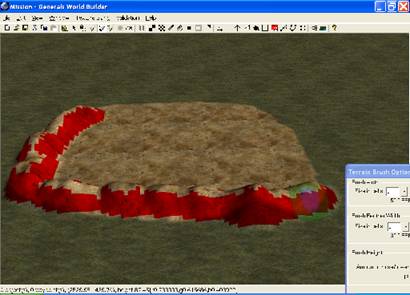
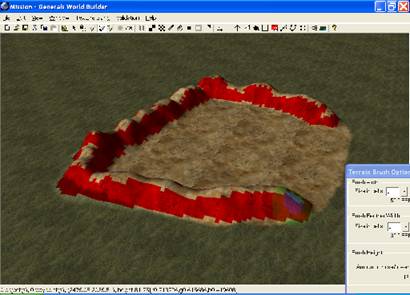
Be sure to fill in the gaps in the middle...
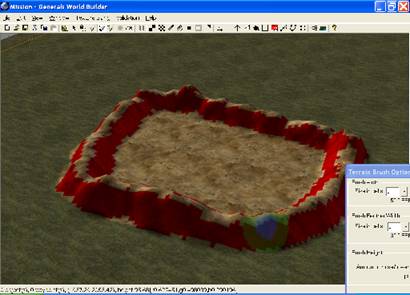
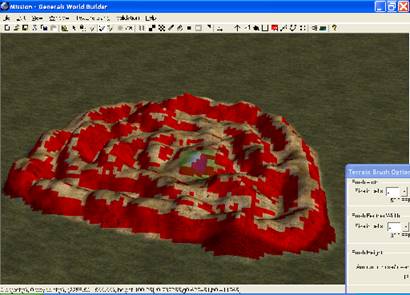
You can then press CTRL+I to see what it looks like inside the game:
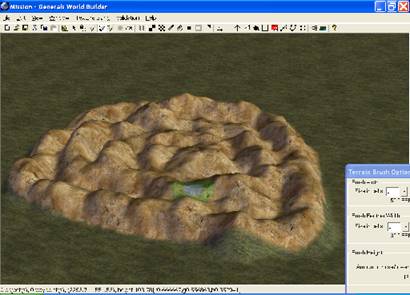
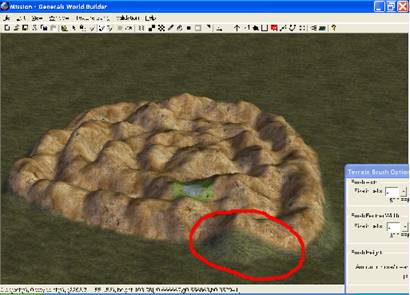
Note: A little grass on the mountain is alright. In fact, I think it makes it look like the mountain has some natural moss on it.
» Adding Water
Now, you might have noticed a blue area around your map if you zoomed out far, or if you went to the edges of your map. That blue area is the default water area. However, you can delete this using the Delete (not backspace) button. Note that the same holds for all objects/waypoints/areas/etc. The default water area is set to a height of 7. However, if you dig your land to below 16, it will go into the water. This makes it confusing because the terrain height and the water height are using different measurement systems.
Create a pool of water using the dig tool, similar to the example below:
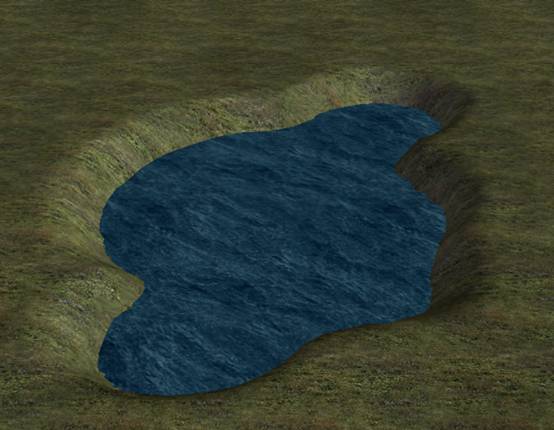
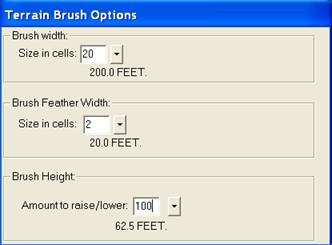
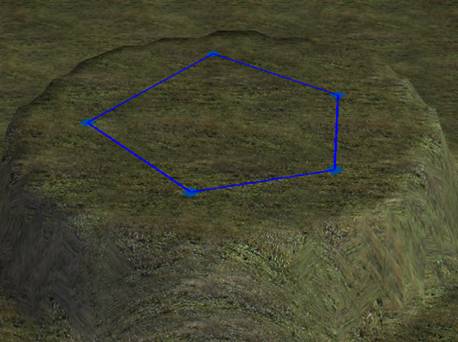
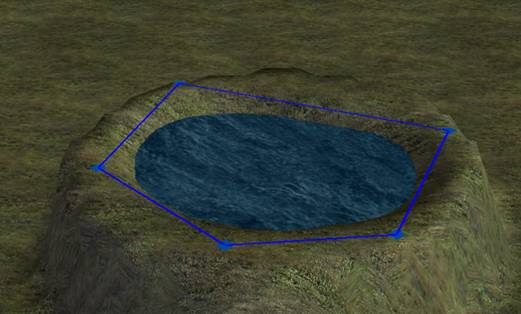
That is one way to make a simple pool of water. You can also make water on top of a mountain, as seen in Tournament Desert. To do this, click the  water tool and click on the map about 5 times (note: you cannot zoom in/out or move the camera at all while you are putting down water, for some reason). Then make a flat mountain by using the mound tool and using these settings:
Then move/place your water handles (the little blue square things) on the cliff, like so:
Next, dig a small hole (about 25 feet) into the middle of it.
Then use the object property box to raise the height of the water, like so:
You can then use your cliff skills to make it look a bit more natural:
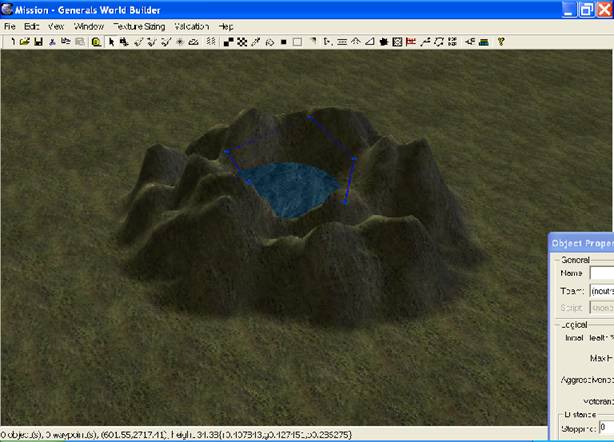
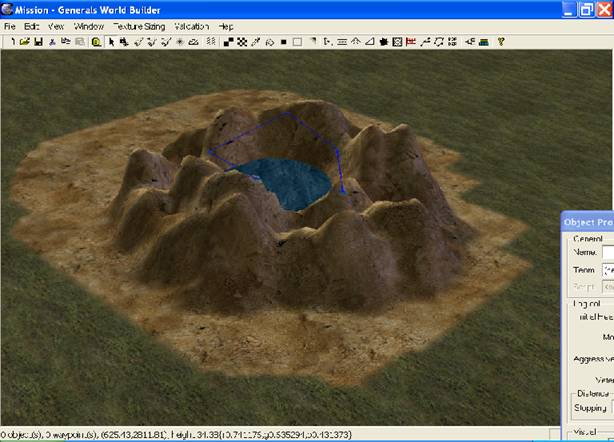
If you are unsure how that was just done, you should go back to the second lesson.
Your map doesn't have to look exactly like my sample one. In fact, I encourage you to just "go with it" if you make a mistake. It doesn't have to be perfect, especially since it's your first map. Now let's move on...
» Some Mapmaking Tips
First of all, you should have some plan for what you are doing before opening up World Builder. For each map, you should start by drawing or opening up Paint (comes standard with Windows) and just painting what you want it to look like.
After you've taken a few minutes to decide what the basis of your map is, now it's time to open up World Builder.
Pick your terrain/texture type from the spill paint tool, and choose the one you'd like inside the object property box.
For this example I used the 2% grass medium type 3:
I'd start out by, not using the dig/mound tool, but by marking every section by placing areas with the  polygon/area tool. Areas can be used to remind you where you want your mountains.
Here's what I did: (I put a mountain-looking texture on the areas I wanted mountains as a reminder; note: unlike the water tool, you can zoom in/out and move the camera during the placement of areas)
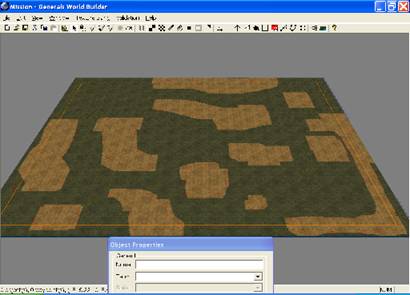
Note that the simplest of ideas are usually the most enjoyable.
You've probably noticed that I went outside of the areas with the mountain texture. That's because it doesn't need to be exact for now. You just need to be able to get an image in your head about what it's going to look like. This is probably the fastest/easiest way to see what you need to do. Now all we have to do is color in the lines (paint the mountains).
This can take anywhere between 5 minutes and 2 hours to do. But for this simple 1v1 map, it only took me 18 minutes. Here's what I got:
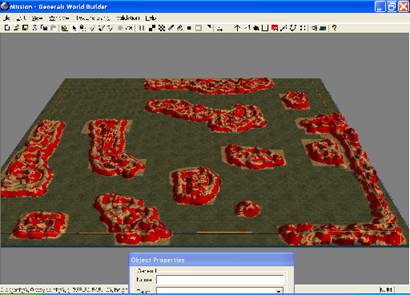
Now we have to shape it up a bit to get rid of the excess mountain textures.
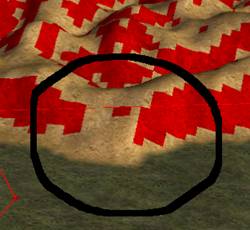
One thing you'll most likely see is that you'll have a straight line of red (impassable), but then you'll have a small hole that's not red (passable). What is passable/impassible terrain?
- Passable: units can cross over it
- Impassable: units cannot go on it (i.e. mountains, water). Anything that has an angle over 89.99 degrees is impassible.
We need to make the outside mountains all impassible, otherwise when units come close they'll go onto the mountains. To do this we need to use the mound tool a bit more, or we can use the paint large area tool and check the "Paint passable/impassible terrain" option, shown below:
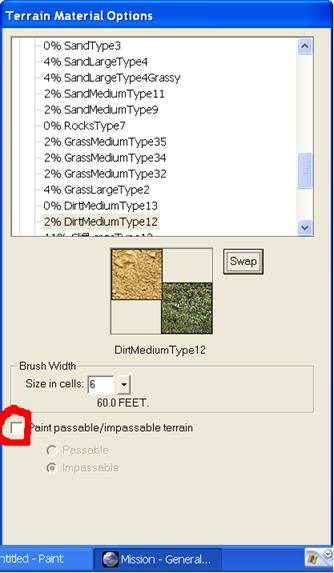
Selecting the impassible option will make everywhere you paint impassible. This works vice versa with painting passable terrain.
You'll notice that when you click the paint passable/impassible terrain option, the dialog will look like this:
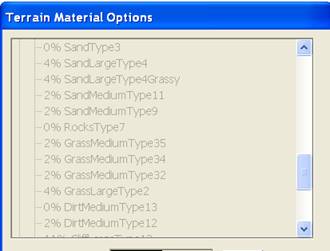
This is normal.
Something else you might consider doing is this:
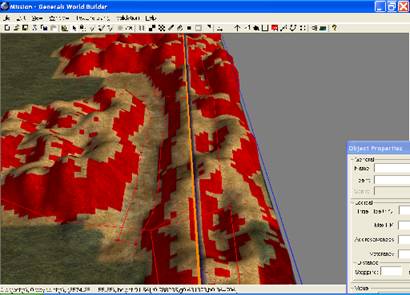
Having a small opening inside a mountain by someone's base is good for people who like to use Hero units or other sneak attacks. But the opening as shown above stands out, so we want to elevate it a little:
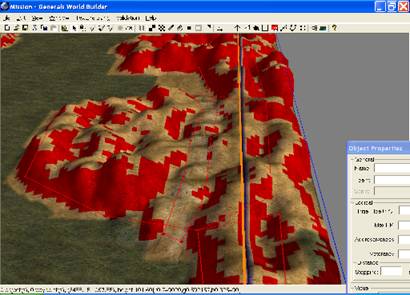
Now use the paint tool to give it its own unique pattern color to stand out. Then use paint passable/impassible areas to make it passable. (If World Builder won't let you paint passable use the  ramp tool to level it out.)
To use the ramp tool simply click and hold on the places you want the ramp. Then, inside the object property box, select how wide you want it, and then click place ramp.
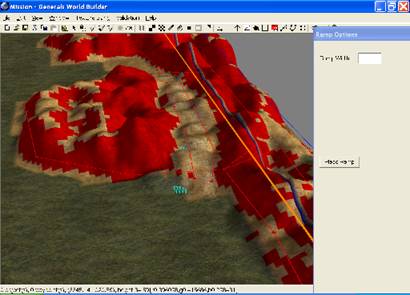
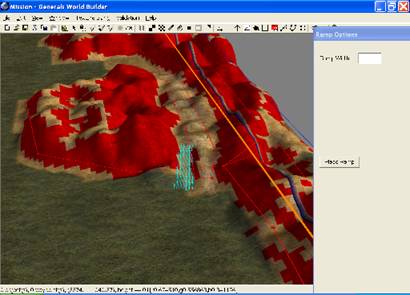
Repeat until it is all flat enough to move over...
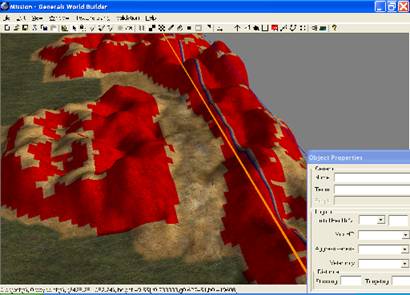
If you have trouble making it flat, use a smaller width for the ramp.
A few general tips on how to make terrain creation easier:
- You can go to View->Show impassible areas, or press Ctrl+I
- View->Show from top down view
- View->Show map boundaries
- You can hold down most tools when you use them [i.e. mound and paint tools] to cover large areas.
- If you have a mountain near the border of the map, make it a little outside the border to make it look more realistic in game. This will make the mountain appear as though it continues on, instead of abruptly ending.
- When using the mound tool, the greater the brush feather width is, the more the "mound" will resemble a "hill".
- In the object property box, when selecting water areas, you can transform it into a river.
- Ctrl+Z = Undo: undo the last thing you did (very useful)
- Shift+Ctrl+Z = Redo: used to undo whatever you just undid by mistake
» Adding Buildings & Objects to the Map
First start by going to EDIT->PLAYER LIST, then click ADD SKIRMISH PLAYERS.
This (1) enables skirmish computer players on your map (easy, medium, hard enemies) and (2) added all the players to your map so you don't have to manually do so every time you place a building.
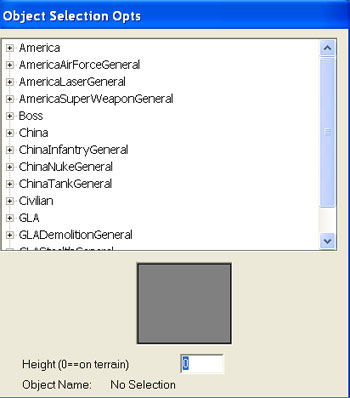
Now that we have done that, we can add buildings. Use the  object tool to get the list of objects in your object property box.
You should see this window:
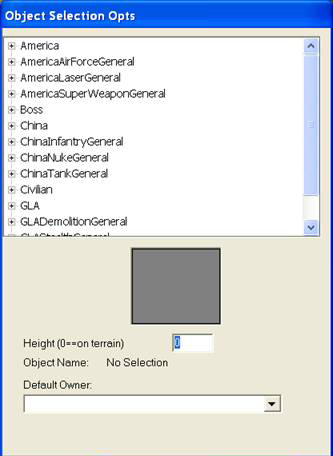
We'll start by clicking the  button, then the
  button to get to civilian buildings/structures.
Scroll down until you see this:
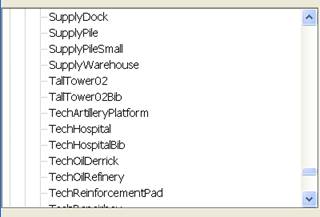
As you can see, we have all the most important structures in one convenient list. We'll start with the supply dock: put one near your first person's base area. Don't worry if it looks like there are no supplies inside your supply dock: this is because we can change how much supplies there are by using scripts. But since this is your first map, we'll leave it at the default amount. When you start up the game it will have all the supplies in it, so continue to put supply docks at the places you want.
- Average Money: 2 supply docks - and maybe an oil derrick - per person
- Wealthy: 2-3 supply docks, a couple of supply piles, and 2-3 oil derricks per person. (Any more than this will make a laggy, hours long game that won't be fun to play again and again.)
If you want to make your map look like a city map, I recommend using supply warehouses. They're a bit slower to get cash from and have a little less cash though, so unless you're making a city map/old country map, I don't recommend you use them.
If you want to put individual supply piles on the map (~3000 dollars each), use the SupplyPileSmall option, not the SupplyPile option.
You may also want to add artillery platforms and oil refineries and such. But be advised that creating too many of these civilian buildings will likely lead to the player who didn't blow all their cash on infantry to capture them winning early in the game. Also, don't just give each player their own tech buildings inside their base; make them leave and work for them. This makes the map more interesting.
If you want to add bunkers (the most popular garrison-able building), look for civilian bunker01 in the list. Don't put too many of them on the map - just a couple per player. The thing that's so popular about bunkers is the fact that you can put them slightly off a cliff to make its range a bit longer against the units below.
Note that tech artillery platforms will not willingly attack units lower than them (i.e. if it’s on a cliff).
Also note that if you place faction buildings (i.e. American command center) on the map, they won't be transferred to the computer automatically.
» Giving Your Map a Makeover
The thing that takes the longest time when making maps is making it look good, so that people who play it won't think it was made by an idiot. One way to do this is to add roads/bridge with the  road tool. Roads are used in between buildings to make the map look more like it has a real town, or to show a pathway from a player to the enemy's base that they might have overlooked. When placing a road, you might notice it auto-links together. You can make the road a broad curve, tight curve, or angled curve. I recommend using broad curve (default) for most things, but sometimes tight curves look better if your road turns a lot.
To make the road look real, have it change a direction (just a little bit) every couple inches on your computer screen.
Another way to make your map look good is to use the  tree/shrubbery tool. This tool is used to put trees and bushes on your map. Note: some trees might appear invisible: delete these and try another type.
If you're going for the old worn-out look, you can use the road tool to make cracks in it. You can also use the  smudge tool to make burn marks on the ground.
If you're making a city map, most likely you're going to make a fence somewhere or another. Use the  fence tool to make fences in a straight line, instead of placing each piece of fence by hand.
If you've ever noticed that when you blended some tiles together they still doesn't look right, you can use the  blend single tile tool to fix it. This works the same as the auto edge out tool, but it's for single tiles.
Also, you might be wondering how to use the scripts tool, or what a script even is. I'll show you now how to do a couple simple scripts for your first map.
A Couple Simple Scripts
First, click the  scripts tool. The window below will appear:
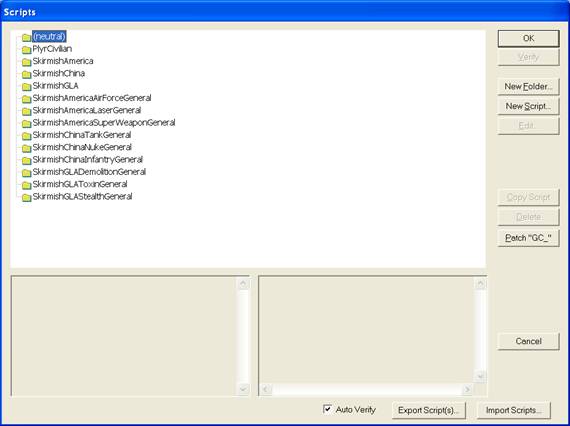
If you don't see all these folders, go to the Edit->Edit player list menu, and click Add Skirmish Players, then hit OK.
Once you're all set, click "plyrcivilian." Then, on the right side of screen, click "new script."
A dialog will pop up, looking like this:
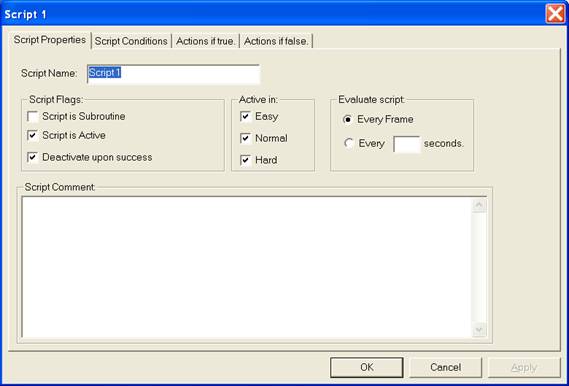
Now, click the "Actions if true" tab:

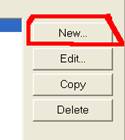
Then click the "New..."button:
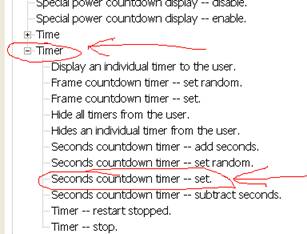
You'll then see a huge list. Expand the list to Scripting -> Timer -> Seconds countdown timer -- set, as shown below:
Click the question marks "???" next to the word "timer" in the box below, and type in "timer1" in the box that appears to name the timer. Click the OK button.
Next, click the number "0.00" and type 10 (seconds), hitting OK again.
Then press the OK button to create the action. Then press OK button on the Script window to finish creating this script.
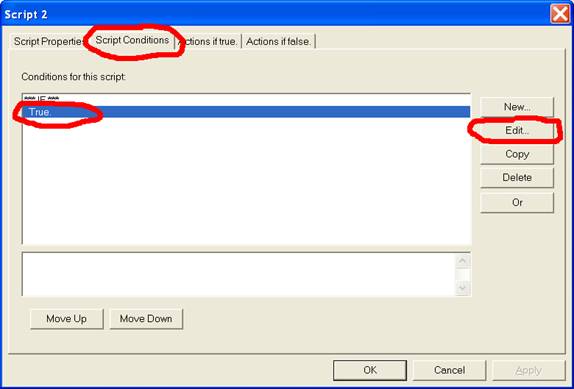
Now, we'll create the second script. Press the "New Script..." button again, and this time click the "Script Conditions" tab. Make sure "True" is selected in the box, and then click the "Edit..." button, as shown below:
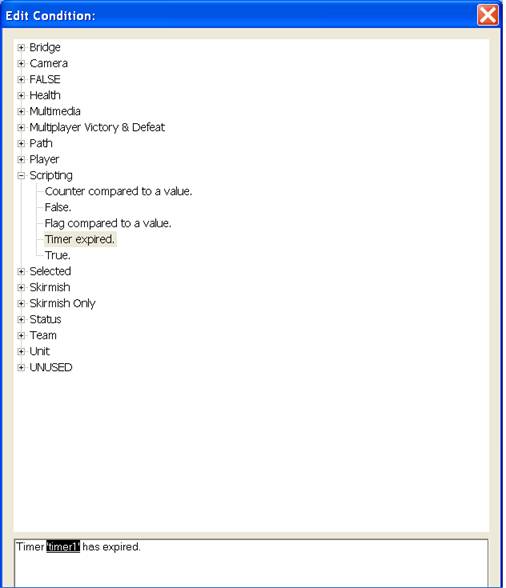
In the menu that appears, select "Timer expired" from within the "Scripting" section. Click the question marks next to "timer" in the box below again, and enter "timer1" for the name of the timer.
Click OK to finish editing the condition. Now, click the "Actions if true" tab again, again clicking the "New..." button. This time, select Scripting -> Briefing -> Show military briefing caption and click on "String: ???" below. Type in what you want the caption to say (for example, "Created by Fleetatks"). If it's longer than about 100 characters (including spaces) then the message will be cut off. Also enter how many milliseconds you want to display the message for (1000 milliseconds is equal to 1 second). Then press OK to finish creating the action. Press OK to finish creating the second new script, and OK one more time to close out of the Scripts dialog. Note that you can open up other people's maps to look at their scripts to learn more about scripting.
Changing time of day: note that you can change the time of day to morning, afternoon, evening, and night by going to Edit -> Edit Map Settings. From this window you can also make it snow on the map.
» Adding Players to the Map & Setting up the Computer AI
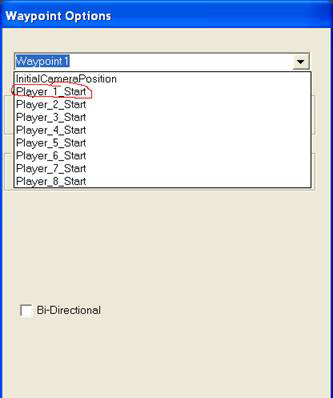
To add a player to your map, use the  waypoint tool and place it were you want your first player to be. Inside the object property box, rename the waypoint to "Player_1_Start" as shown:
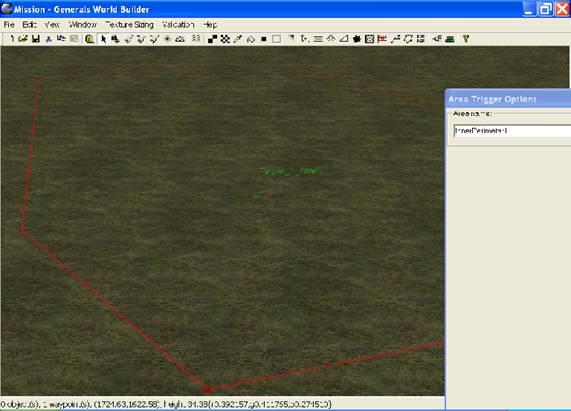
After you've done that, use the  polygon/area tool to make an area around the space were Player 1 is going to put most of his buildings (i.e. where he will build his base). Name this area "InnerPerimeter1" like I did below:
 Again using the polygon tool, make another area around where the player should begin being warned of an enemy unit entering into his base. Usually, you place the perimeter just outside any entrances to the base, so that the area covers the entire base and a bit beyond. This area gives the computer AI the information it needs to determine where to build its base defenses and where to guard against attacks.
Now we need to tell the computer where the primary part of the map (usually the middle area) is.
 Create an area around the primary (usually central) location the AI should guard and gather units in, until he sends them in for the attack. After you've done that, name it the "CombatZone" (note that it's not in the list, but it is needed).
 Now make a waypoint inside the combat zone near the edge closest to the path to Player 1's base, like this:
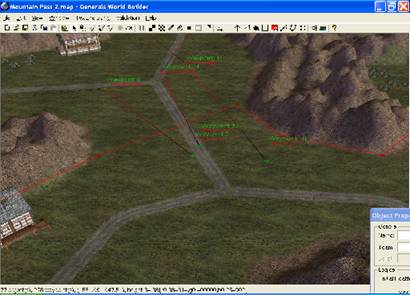
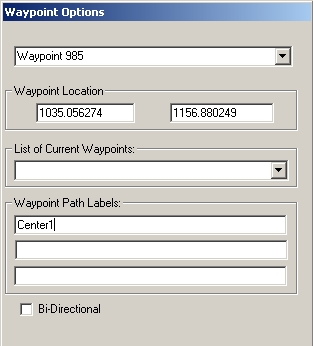
While still in the waypoint tool, click and hold on the waypoint and drag to another area to make an arrow pointing in its direction. This is called a Path. Paths tell the AI how to get to another person's base. Create a path to each entrance of each base (there should be 2-4 entrances to each base if you want it to be an exciting game). After you've done that, click on one of the waypoints and in the object property box, enter the following values for Waypoint Path Labels:
For the main entrance: Center1
For the second entrance: Flank1
And for the sneak attack, back-door entrance (if there is one): BackDoor1
Do this for every player's entrance, changing only the number (e.g. "1") to match each player's number. (Example: BackDoor1, BackDoor2, BackDoor3, etc.)
For Example
Hopefully this tutorial has helped you learn the basics of making maps. If you're looking for more information about making maps in World Builder, a good resource is EA's Official World Builder Manual for C&C Generals. The steps described therein are, for the most part, still applicable for the World Builder program with the Zero Hour expansion.
If you have any questions or comments, feel free to post them in the Maps & Mods Forum, or email the author at BIGbillyoncampus [at] msn.com.