
This page details how to correctly create a compressed folder (.zip file) for your Generals or Zero Hour map that you have created before submitting it to our website. By following these guidelines, you help speed up the map review process and the uniformity of and ease-of-installation for maps downloaded from C&C Labs.
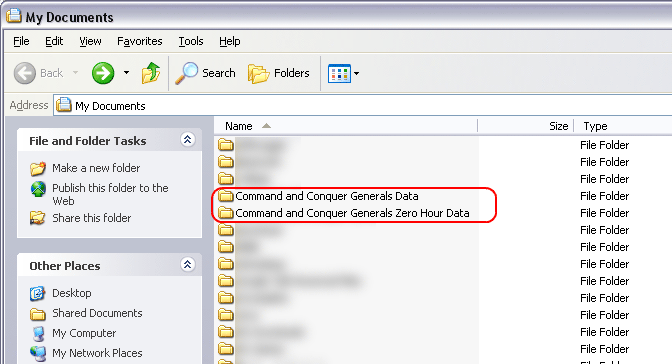
Step 1. First, you must open the My Documents folder, in which C&C Generals stores its data. One way you can access this folder is via the desktop. As shown in the image below, click on the "My Documents" icon on your desktop. You can also access the My Documents folder via your Start Menu.

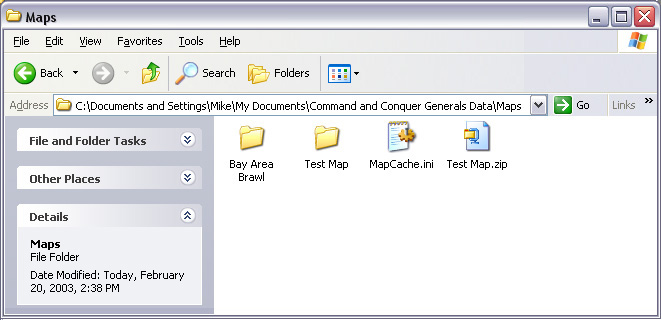
Step 2. Second, you need to open the Command and Conquer Generals Data folder, if your map is for C&C Generals. If your map is for C&C Generals: Zero Hour, you need to open the Command and Conquer Generals Zero Hour Data folder, as seen below. These are the actual folders in which Generals and Zero Hour store most of your game data.
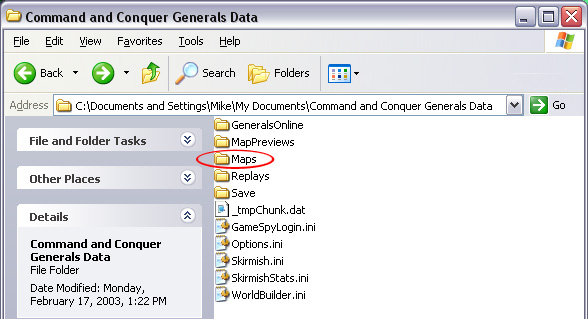
Step 3. Next, you need to open the Maps sub-folder. This is where fan-created maps are stored.
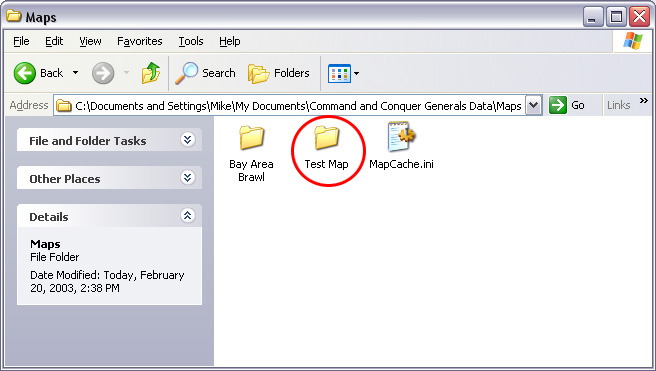
Step 4. When creating your map with World Builder, you should have saved it in its own folder inside this maps folder. The folder name should be the same as that of the map.
For the next step, please select an option below:
To continue, you must either be using Windows XP, or you must have WinZip installed. If you are not using Windows XP, please install the latest trial version from WinZip.com before continuing.
» I have WinZip installed on my computer.
» I don't have WinZip installed on my computer, or I don't know what WinZip is, but I am using Windows XP.
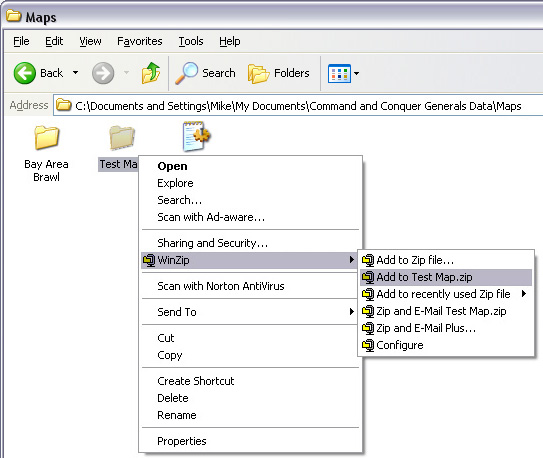
Step 5. I have WinZip installed on my computer.
Right click on the folder of the map you wish to submit. On the drop-down menu that appears, select WinZip, and then "Add to Test Map.zip", where "Test Map" is the name of your map.
If you don't see the WinZip menu in your right-click menu, you need to reinstall WinZip. You can download the latest WinZip version from
WinZip.com.
 Step 6.
 The new compressed folder (.zip file) should now appear.
 Step 7.
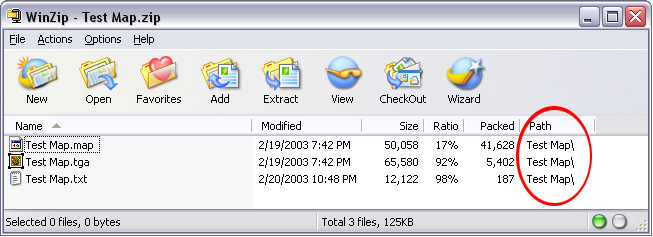
 If you wish to check to see if you have correctly stored the path (folder name) of the map into the new .zip file, you may open the .zip file by double clicking on it. The following WinZip screen will then appear. Notice the circled "Path" column shows the name of the map as the path. This means you have correctly stored the folder information. As long as your zip file contains the .map and .tga files shown in the image below, your map is now ready to submit. You may also want to include a text (.txt) "readme" file with information about the author (yourself) and the map.
 Step 8.
 Your map is now ready to submit! Return to the
Submit a Map page and fill out the map information form.
Step 5. I don't have WinZip installed on my computer, or I don't know what WinZip is, but I am using Windows XP.
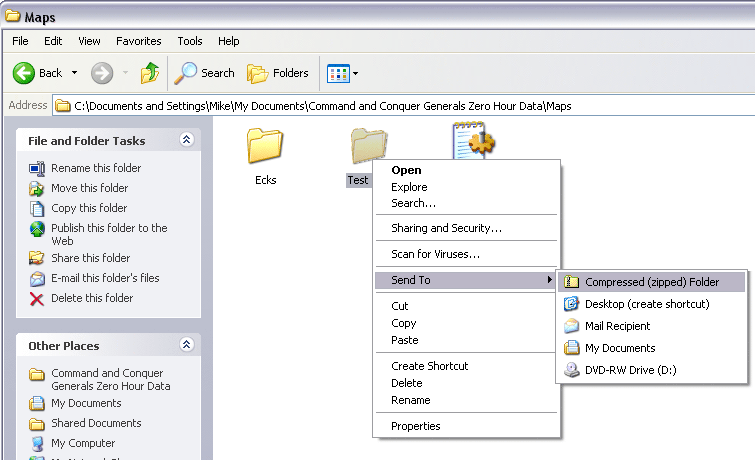
Right-click on the folder of the map you want to submit. On the drop-down menu that appears, select "Send To" and then "Compressed (zipped) Folder" as shown below.
 Step 6.
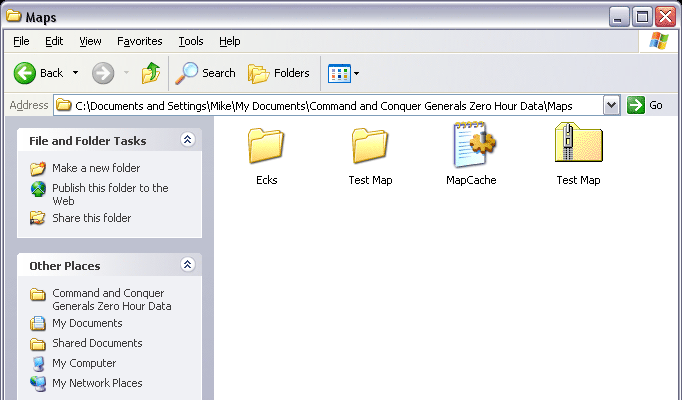
 The new compressed folder should now appear.
 Step 7.
 You may now add any additional files to the compressed folder by clicking on the file(s) and dragging it over, on to the compressed folder. For example, you may wish to add a text file containing information about the author (yourself), such as how to contact you, and the map. You deserve credit for your work, after all!
Step 8. Your map is now ready to submit! Return to the
Submit a Map page and fill out the map information form.