By: Gren
Setting the Player Starting Points
So, to begin placing objects on the islands, the first and most important task is to set up the Player Starting points.
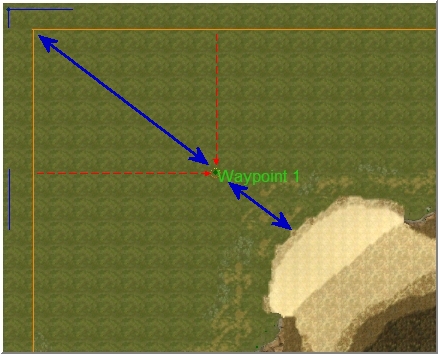
Select the Waypoint tool from the toolbar  and select a point on the north Island, approximately two-thirds of the way from the corner of the map border and the edge of the beach area. A single left click of the mouse will place the waypoint and a label will appear 'Waypoint 1':
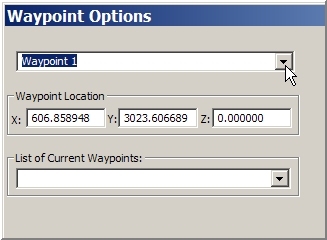
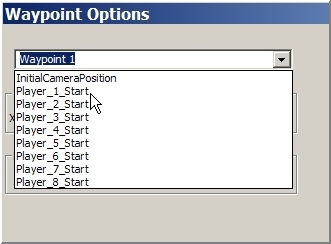
In the Waypoint Options dialogue, use the drop-down on the top input field and select Player_1_Start.
The label for the Waypoint on the map will be updated:
Waypoint Label Updated
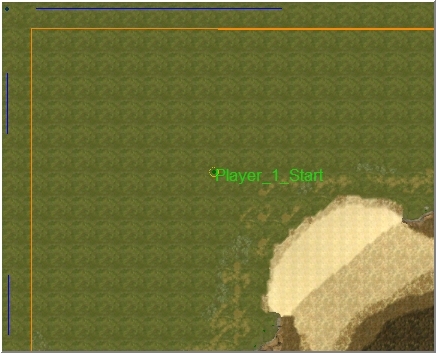
The Construction Yard for Player 1 will be placed here when the game starts. It is not too critical where the starting point is placed, as long as there is sufficient room between the site of the Construction Yard and any Ore Nodes (Resources) placed close by.
Now using the above procedure set the starting point for Player 2 on the south island.
Save your work.
Using Grids
Many mappers like to use grids as an overlay for placing and checking objects on the map. This is fair enough if you wish to create a map that is exactly symmetrical. I am by no means any kind of artist, but I like to use my own judgement about where I place objects on a map, which I think helps to create a more natural environment.
There are two types of grid we can use. The first type is a grid that can be set as an overlay, which can be adjusted to just about any setting you may wish to use. To access these settings, choose the View option from the Menu bar, then Grid Settings:
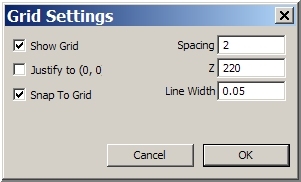
The settings I have entered here; Spacing of 2, Z Axis (the height to be displayed at) and the Line Width of the Grid will produce something like this:
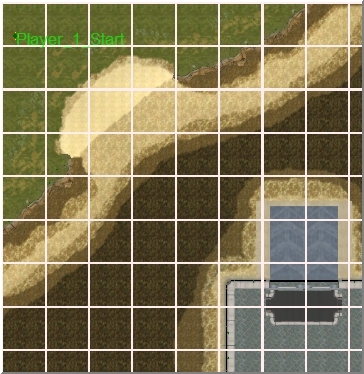
The display of the Grid will change as you zoom in and out of the map, so you will need to experiment a little with the settings until you have what you require. This grid is also accessible via keyboard shortcut of CTRL+G once you have the settings entered.
The other Grid tool is used for actually placing objects on the map and is called the Placement Grid. This is available from the Edit menu option, then Enable Placement Grid, or CTRL+ALT+G.
The Placement Grid
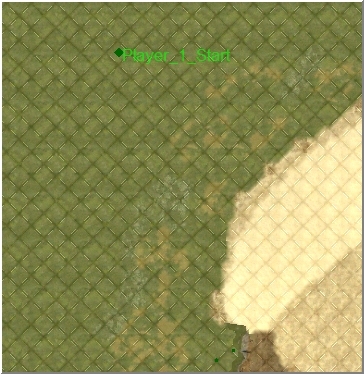
Many mappers use this grid to place all objects on to the map, and it is a very useful tool to ensure that your buildings and resources are accessible in-game. If you use this grid for nothing else, it is a must that you use it to place Ore Nodes.
Ore Nodes, in game, are one of the objects on a map that have regular movement of traffic to and from a Refinery, collecting resources and boosting the player's bank balance. When a Refinery is built in-game, and the player sets it down, a placement template for it appears in front of the Ore Node on the map.
Ore Nodes that have been placed and rotated or re-positioned without using the grid, can result in a distortion of the path between it and the Refinery, bringing about an annoying displacement and in some cases, prevents access to the Node altogether.
Try to avoid placing Ore Nodes too close (side-by-side) to each other too, as this can sometimes confuse the AI as to which Refinery is supposed to be resourcing from which Ore Node and can also result in a Node becoming inaccessible.
So with the Placement Grid enabled, I'm going to set down four Ore Nodes for each of our players. Two of the Nodes will be on the player islands, within the range of the player Construction Yard (on our map, the Player Starting Point) and the other two will be placed in the sea for expansion.
Select the Place Object tool from the toolbar  and in the Objects Selection Opts dialogue, expand the Neutral, then the STRUCTURE trees. Most of the game Resource and Technical structures are in here.
Click on the OreNode option to hang the structure on the end of the tool. Click on the map where you wish to roughly place the node, ensuring that we are inside of the yellow/orange map boundary line. Final positioning can be done by using the Select and Move tool, and the rotation utility (if needed) in the tool.
For the other Nodes, you can either repeat the above procedure, or CTRL+C to copy the structure and CTRL+V to hang it on the tool again, left clicking once to place it on the map, repositioning and rotating as required.
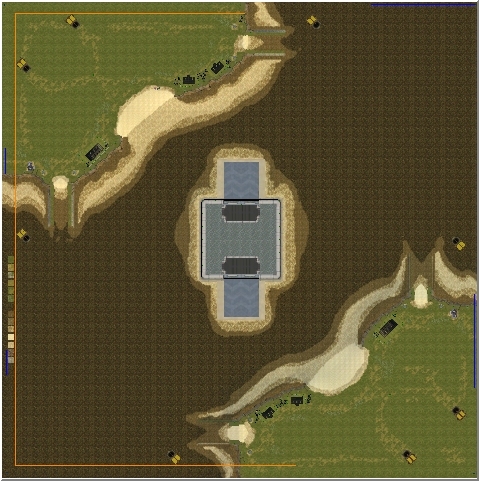
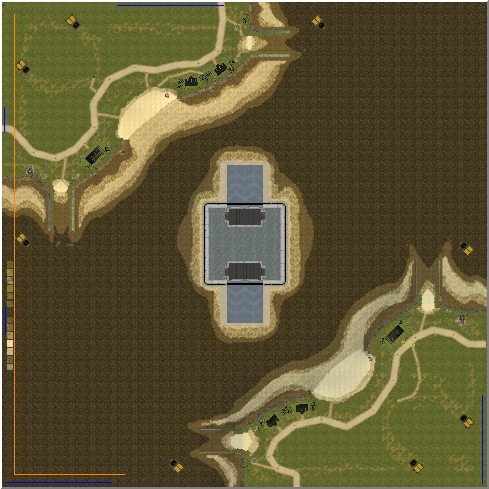
This overhead shot shows where I decided to place the nodes on our tutorial map:
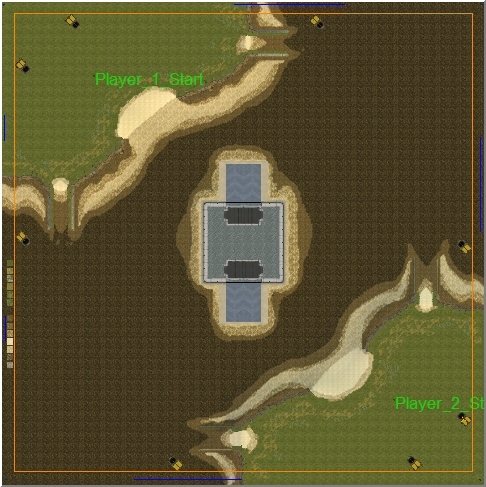
Two Ore Nodes are sufficient as starting resources on our 2-player map, with 2 more placed in the sea for expansion purposes. You don't need to raise any terrain when you place them in the sea. Position them on the sea floor in Worldbuilder, in-game, they will appear on the surface of the water.
Avoid over-resourcing your map by adding too many Ore Nodes and Oil Derricks. This can lead to your map being too easy and will soon bore the players. Resources should be strategically placed and defendable.
Now I'm going to place a few building objects on our player islands and add a little more texturing there.
Adding Roads – The Road Tool
There are two methods of adding roads, streets and tracks to your map.
Seeing as we are working on the player islands at the moment, I'll demonstrate the first way of doing this by using the Road Tool. Zoom in to a comfortable working level to the north player island and select the Road Tool  from the toolbar.
The Object Properties window is replaced by the Road Options dialogue;
Road Options Dialogue
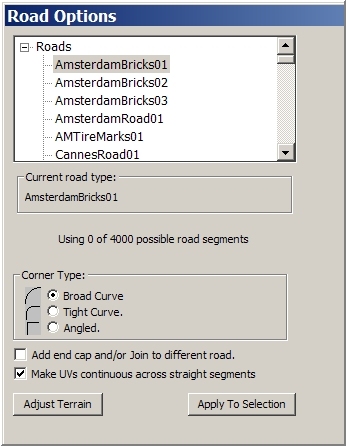
As we can see, there are around 130 different road, street, track segments and road marking sections to choose from and we can choose to change the curve type of a bend in the road by using a Broad, Tight or Angled curvature. (Corner Type)
There are road types to suit all environments e.g.; Snowy Roads, Dirt Tracks etc. For our small map, I'm going to choose a road that is suitable for our small player islands, but the method of placing the roads is the same for all.
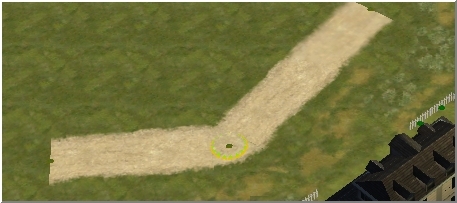
Using the scroll bar to the right of the options window, scroll down and choose HawaiiDirtRoad01. Move the pointer on to the map and the icon changes to the Road Tool icon. Left click and drag out a section of road, anywhere on the grass terrain section of the island. Release the mouse button and in the same way, drag out a second section of road, just in front of the previous one;
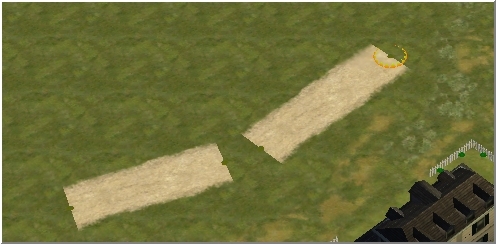
Join these two sections together by choosing the Select and Move tool from the toolbar and click and drag one of the segment icons, dropping it over the closest icon of the other segment.
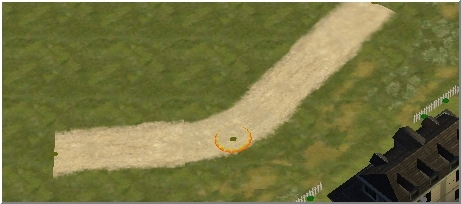
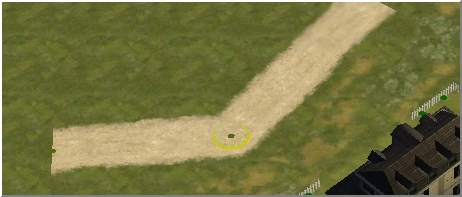
Depending on the curvature you have selected, the two segments will join together accordingly;
Broad Curve
Tight Curve
Angled
The segments can then be made longer or shorter by click-and-drag movements on the un-joined icons of the segments, and the joined sections can be re-positioned using click-and-drag on the joined icons.
Practice these procedures a little to get used to the tool, then add further sections to make a road across the island, similar to this;
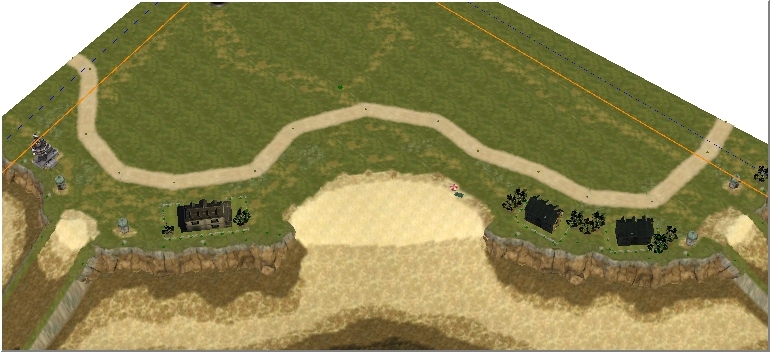
You can also join a section to this road simply by laying it down, and using click-and-drag, join the new segment's icon to one of the icons in the existing road, but be aware of the curvature you have already set.
Worldbuilder also allows you to join a section of a different type of road to the one you have laid down;
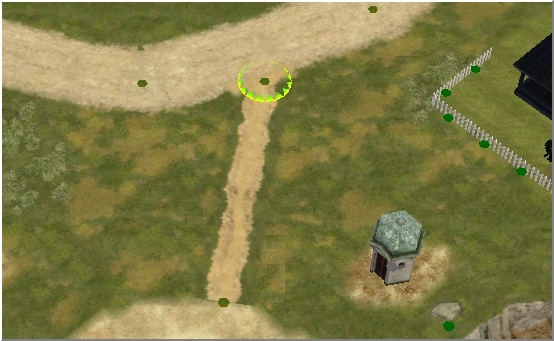
Choose the Road Tool again and in the Road Options dialogue select HawaiiFootPath01. Lay a segment from the edge of the texture work at the top of the Ramp area, up towards the road we have just put down. In the Road Options dialogue, check the item: Add End Cap and/or Join to a Different Road. This will shape the end of the new section and apply a reasonable angle so that you can lay it next to the edge of the existing road;
So now experiment a little with this and lay down a few more footpaths. Then lay down the road and footpaths on the other player island.
Roads and Footpaths
You can, if you wish, add a little extra texture work along the route of the road. Sometimes this gives a little more enhancement and reality to the terrain.
Save your work. 
Adding Roads - Using Road Objects
The second method of putting roads into your map is by using Road Objects and although our Island Fortress is rather small, there should be sufficient room on there to show you how it is done.
In top down view, zoom the map in to a comfortable working height on the Central Island Fortress. Select the Place Objects tool from the toolbar and in the Objects Selection Opts dialogue, expand the Island Fortress, Optimized Props tree and select IF_StreetSegment01 and place it on the sea floor next to the Island Fortress. In the Object Properties dialogue, set the Z-Axis to 1 and the Angle to 90. This will rotate the segment and reveal the road markings.
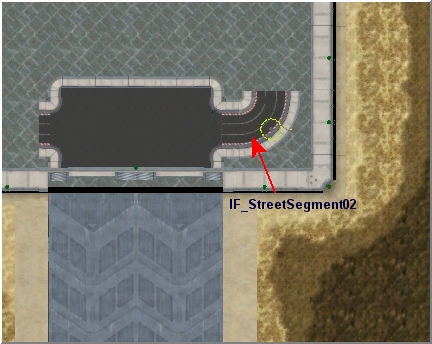
Select IF_StreetSegment02 and place it on the sea floor, then again, set the Z-Axis value to 1.
Drag IF_StreetSegment02 to the bottom right corner of the Fortress deck and position it next to the Access Ramp landing bay, aligning the two sections as accurately as you can.
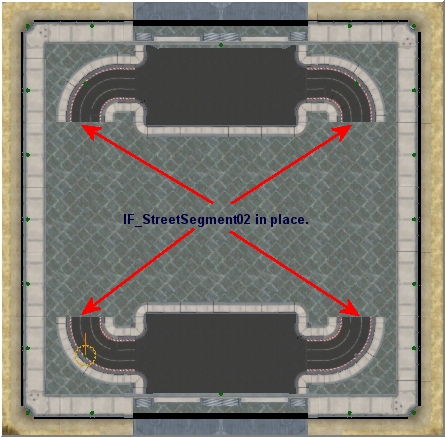
With the segment still selected, press CTRL+C to copy then CTRL+V to hang the segment off the tool and place it elsewhere on the Fortress Deck.
In the Object Properties, change the segments Angle value to 90, then drag and position it similarly, at the top right corner of the Fortress deck.
We still have the segment in memory, so press CTRL+V again, place the segment on the deck, but change the Angle value to 180 this time and position the segment at the top left of the Fortress deck.
Repeat the paste for the last IF_StreetSegment02, place on the deck and change the Angle value to -90, similarly aligning to the Ramp Landing Bay area at the bottom left corner of the Fortress deck.
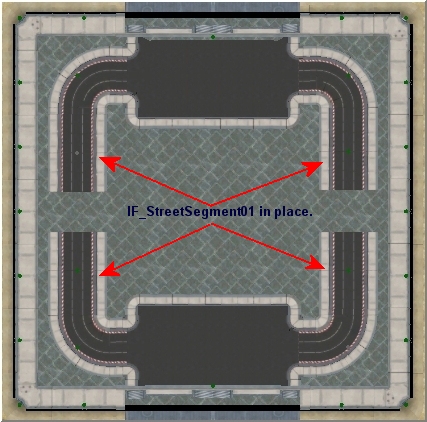
Select the IF_StreetSegment01 on the sea floor and drag it on to the Fortress deck, positioning it below IF_StreetSegment02 at the top left of the deck, aligning it as accurately as possible.
Use CTRL+C to copy the part, then CTRL+V as before to place on the deck and position next to one of the other IF_StreetSegment02 segments. Continue until you have four IF_StreetSegment01 parts in place;
Using the Place Object tool, select IF_StreetSegment08 from the Objects Selection Opts, Place it on the sea floor, rotate by 90 and set Z-Axis to 1. Copy the part again and using the two sections, complete our small Fortress Island road.
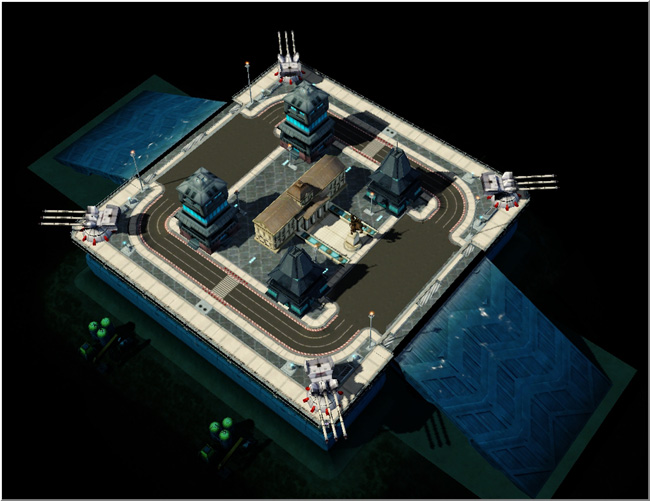
Road Completed using Road Objects

All that remains for us to do with the Fortress now is to populate it with some garissonable structures, perhaps some defences, maybe a resource asset or two for capture and defend purposes and a few Island Fortress props.
With the exception of the Oil Derricks and the Academy, all of the objects here are within the IF_IslandFortress section of the Object Selection Opts.
Save your work.
Top
» Next ~ The Finished Map