By: Gren
Making the Island Player Bases
Having made the basic Fortress, we will leave it there for the time being and look at making the islands which will be the location of the player starting points for our 1-v-1 map.
I will be deviating slightly from our original rough sketch, so that I can incorporate a demonstration covering the use of the Terrain Copy tool.
Set the map view to top down by using CTRL+F or by selecting the View option and selecting Show From Top Down View.
Now select the Height Brush tool  and set the Brush Width to 20, no Brush Feather Width and Height in feet to 210. Begin making the first island in the top left-hand corner of the map:
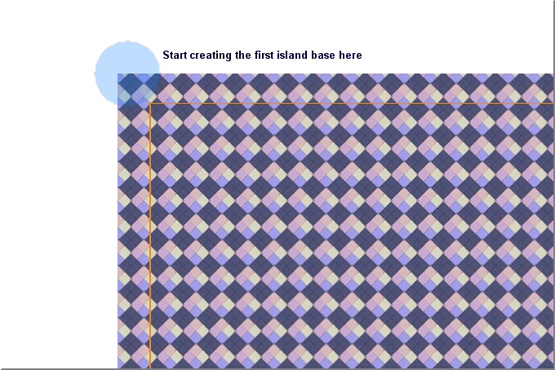
Click and hold the left mouse button and drag the tool around to create the shape of part of a shoreline. An example shot of this is quite difficult to see from overhead, so I am going to paint the raised land area with a basic grass texture, to make viewing easier.
Select the Large Tile texture tool  and from the Terrain Material Options, open the Yucatan folder and select grass_yucatan02-256 and paint the top of the whole island area.
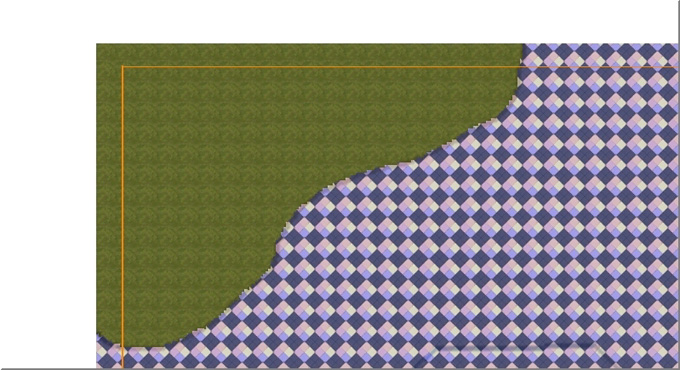
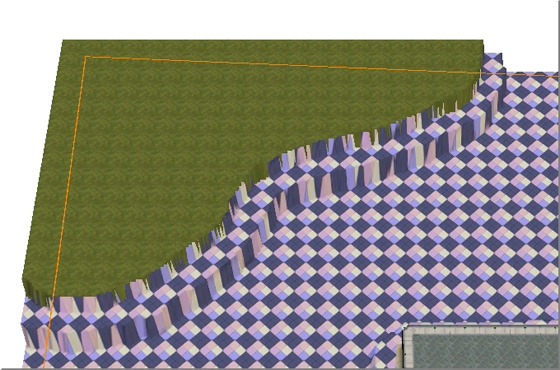
Use CTRL+F again to exit from Top Down View. You should have something similar to this:
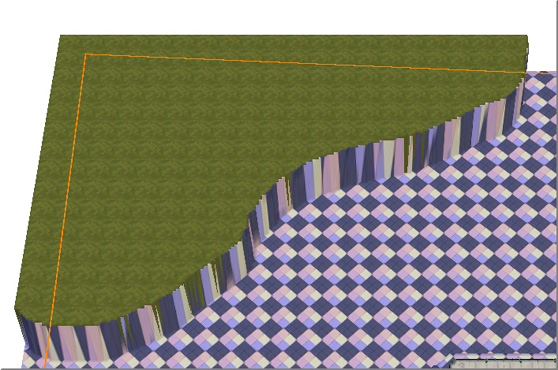
Don't worry that we have spilled over the edge of the land with texture; this will be either hidden by our cliffs or blended in around the beach area.
To help with placing the cliff objects and creating the beach area and ramps, we will create a "shelf" again around the contour of the land area in a similar way we used around our Fortress.
Set the Height Brush to 5, (50 feet) no Brush Feather Width and Height of 130.
Save your work. 
Top
Making the Beach Area on our Player Island Base
My next step would be to create the beach area for this island base, around the central part of the coastal profile. For this task we will be using the Smooth Height tool.  Select the tool from the toolbar and in the Feather Brush Options dialogue, set the Brush Width to 20, (200 feet) the Filter Radius to 4 and the Feather Rate to 10:
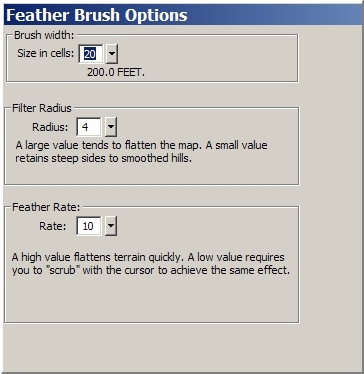
Take note of the explanations for each setting as this tool takes a little practice until you get used to it.
Begin in the centre of the coastal profile by placing the edge of the brush against the upper cliff area and smooth the bottom shelf into a slope to the sea floor, then smooth the upper area into the lower using short movements towards the sea-bed.
You will notice that the tool raises the terrain in places as well as lowering it as part of the smoothing action.
Work in small short strokes. Remember, you only have a memory to undo the last 10 operations. If you exceed this limit, you will need to reload your map and begin again.
Continue smoothing until you have something similar to this:
Smoothed-out Beach Area
Reduce the Brush Width (Size in Cells) to 15 in the Feather Brush Options and smooth the rest of the lower shelf around the island into the sea floor. We need to retain some of the shelf to use like a guide when we place the RA3 Cliff Objects, so begin smoothing by placing the edge of the brush on the outer edge of the shelf.
Smoothed-out to Sea Bed
Smoothing Completed
You can practice smoothing a little more with the Smooth Height tool on the shelf we placed around the Central Island Fortress. Use the same tools settings and place the brush shape approximately half on the shelf and half on the sea floor.
Around the Central Island Fortress
Save your work.
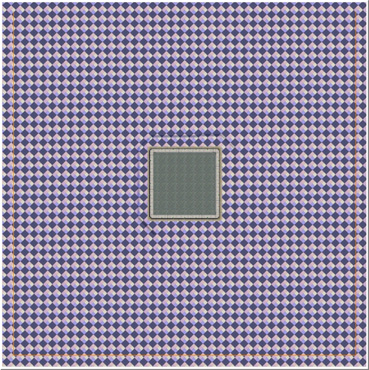
Our example map should now be looking similar to this:
Top
Placing Access Ramps (Land to Water)
Quickly referring to our rough design sketch, we decided that we would place a couple of access ramps to our player islands into the sea. This step of the tutorial will demonstrate the use of the Ramp Tool.
Our example map is quite a small map; therefore the ramps I will be placing will be reflective of this and although they will be usable in-game, will not be so very practicable.
Zoom the map in to the left edge of the map on the southern-most tip of the island base.

Use CTRL+F to change the map view to Top Down View.
 Select the Ramp tool from the toolbar.
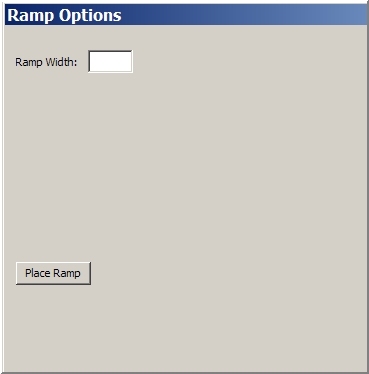
The Object Properties dialogue is replaced with the Ramp tool Options. There are just 2 controls on this tool:
Ramp Width input field
Place Ramp button
Enter a value of 90 in the Ramp Width field.
Click and drag the ramp shape on the tool from the Sea floor to the Island, carefully setting the position and ensuring that we remain on the correct side of the map border.
Setting the Ramp Position
When you are happy that the ramp is positioned correctly, click on the Place Ramp button. The ramp is inserted to the terrain, but with the tool still active, you will still see the blue profile over the placed ramp. Right click once with the mouse to exit the tool and use CTRL+F to change the map view to inspect our ramp.
Southern Ramp
Carry out the same procedure for the second ramp to the north of the island, pointing it in an easterly direction towards the sea floor.
Northern Ramp
Save your work.
Top
The Terrain Copy Tool
Now we are almost ready to add RA3 Cliff objects, terrain texture and populate the island with the player starting point and other objects such as buildings and resources. Before we do this, we are at a suitable place in our tutorial to demonstrate the use of the Terrain Copy tool.
The tool will copy and allow you to place elsewhere in the map, terrain heights and shapes and terrain textures. It does not copy placed objects on the map such as buildings or cliff/wall objects or road objects. These items are treated quite differently and will be covered later on in this tutorial.
We could, at this point add basic terrain textures, which would be included in our terrain copy, but I think that texturing goes hand-in-hand with the general object population of the map and I like to add a little variation to the texturing of a copied section of terrain.
Using the Terrain Copy tool is almost like painting textures when we have the tool in Select mode. We can add or remove parts of the terrain to be copied.
Click on the map with the mouse wheel to reset the map orientation and then use CTRL+F to switch the map into top down view.
Select the Terrain Copy tool from the toolbar.  The Object Properties dialogue is replaced with the Terrain Copy Options settings:
Terrain Copy Options
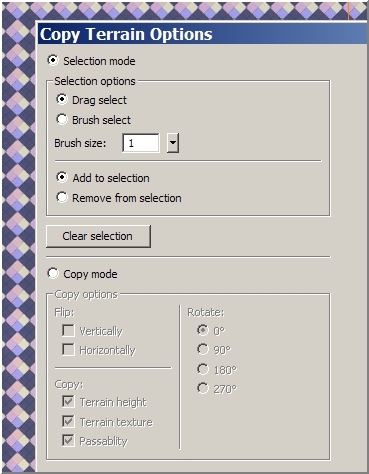
In Selection Mode, just the top half of the options dialogue is active.
When we have made our selection of terrain to copy on the map, checking the Copy Mode radio button will make the top half is de-activated and the lower half activated.
There is also a Clear Selection button, which removes any copied terrain and allows you to start from scratch with a clean slate.
If you are copying lots of different areas, you will need to use the Clear Selection button each time you move on to copy another area.
In Selection Mode then, I usually leave the Drag Select option checked and seeing as we are copying quite a large area, I would change the Brush Size to 5.
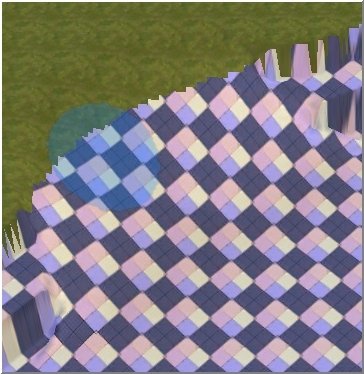
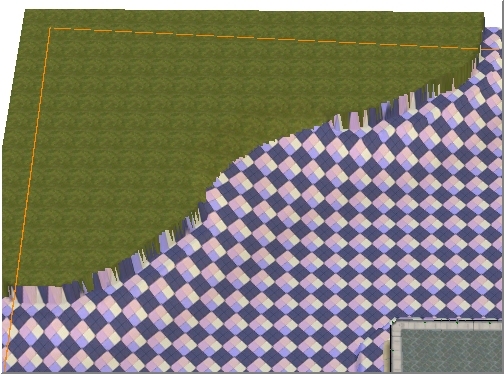
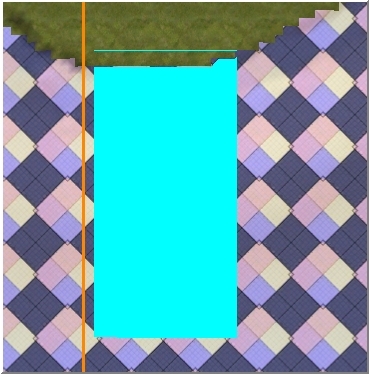
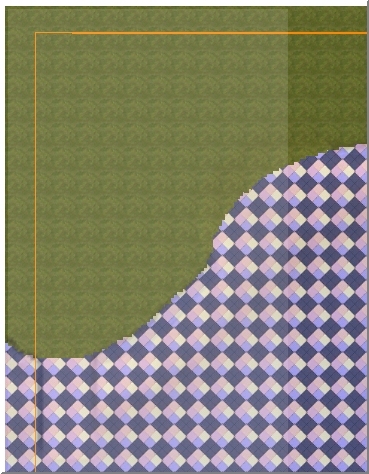
Ensure Add to selection is checked, then "paint" an area on the map from the top left-hand corner, outwards and downwards by clicking and holding the left mouse button and dragging. Releasing the mouse button will place an overlay over the area, showing what we have copied into the tool:
You can just see the faded overlay in this picture, indicating what we have copied.
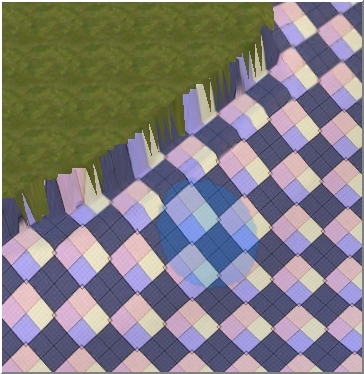
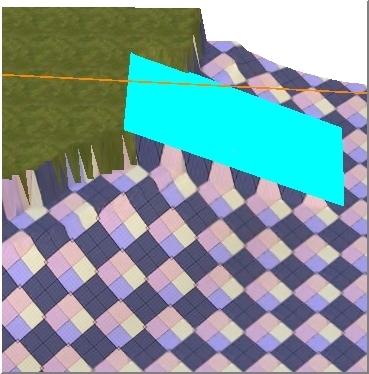
Now, still with Add to selection checked, click and hold just inside of the overlay at the very top of the map and draw downwards and outwards again, releasing the mouse button when we have covered the whole of the island.
Make sure that you include enough of the sea floor to take into account the smoothed out beach area, the shelf we placed around the island and smoothed into the floor and the ramps we placed.
When you release the mouse button, you will notice that the shape of the overlay changes to an inverted "L" shape.
This area is now copied into the tool buffer and is ready for placing elsewhere on the map.
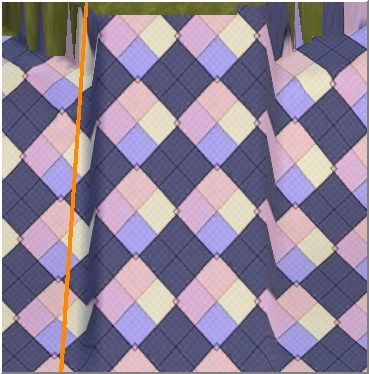
Selected Area
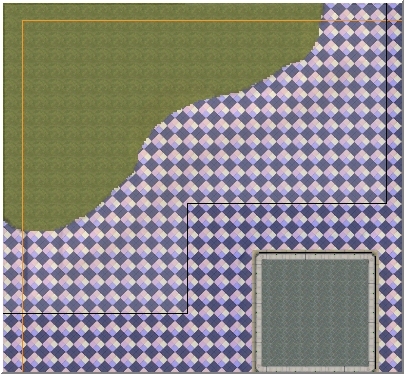
I have highlighted our selected area with line for easier viewing in this image.
Now click on the Copy mode radio button in the lower half of the options dialogue. The copy options are now made active.
We are going to make a clone island base in the opposite corner of the map, so we need change the orientation of our selected area to suit. Check both the Vertical and Horizontal Flip options in the dialogue and ensure that Copy Terrain height, Terrain Texture and Passability are also selected.
There is also a set of parameters to allow us to Rotate our selection if we needed to, but for this example, flipping will do the job quite nicely. Leave the rotation options set at zero degrees.
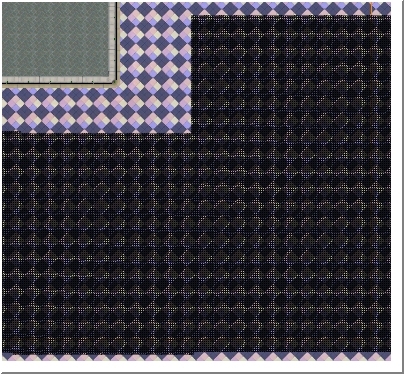
Moving your mouse pointer back on to the map area will display the flipped selection as a dark grid, floating beneath the mouse pointer.
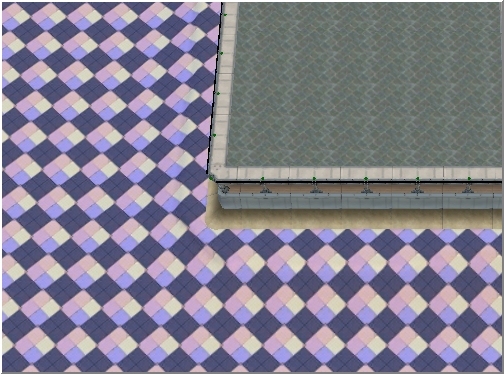
Zoom the map in to the lower right corner of the map to a comfortable level and carefully align the dark grid so that it fits exactly in the corner, with the side and bottom edges of the grid, lining up to the edges of the map.
When you are satisfied that the grid is positioned correctly, a single left mouse click will insert the copied terrain to the new position. Right clicking the mouse will exit the tool.
Placing the Grid on the Map
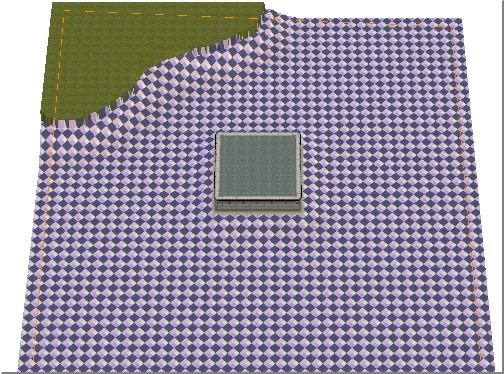
Terrain Copy Complete
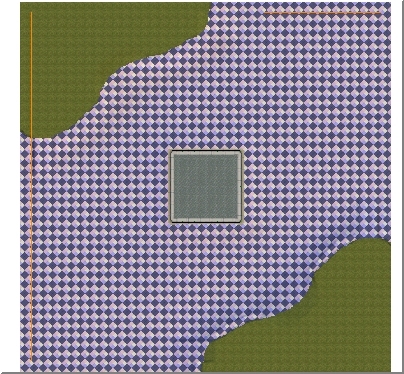
Save your work.
The Terrain Copy tool has saved us a lot of work. We now have our second player's island base, complete with ramps and a prepared beach area.
Top
» Next ~ Island Fortress Ramps